Documentation Index
Fetch the complete documentation index at: https://docs.bland.ai/llms.txt
Use this file to discover all available pages before exploring further.
Introduction
Custom tools in Bland allow you to integrate external APIs into your workflows, prompts, and pathways. You can manage your tools at: https://app.bland.ai/dashboard/tools There are two main categories of custom tools:- Tool Showcase: A public library of user-contributed tools that can be searched and reused.
- Your Tools: Tools you’ve created and configured, either for private use or sharing.
Tool Creation Overview
When creating a new custom tool, you’ll define four major configuration sections:1. Basic Information
- Name: How the tool will be labeled in your UI and logs
- Description: A short explanation of what the tool does
- Speech Prompt (Optional): Text your agent should speak when the tool is triggered
2. API Configuration
API Endpoint URL
The endpoint of the external service.HTTP Method
Choose HTTP method (GET, POST, etc.)Timeout
How long the tool should wait for a response (in ms)Query Parameters
Optional key-value pairs to append to the URL These query parameters can also be interpolated using variables captured throughout your pathway. For example: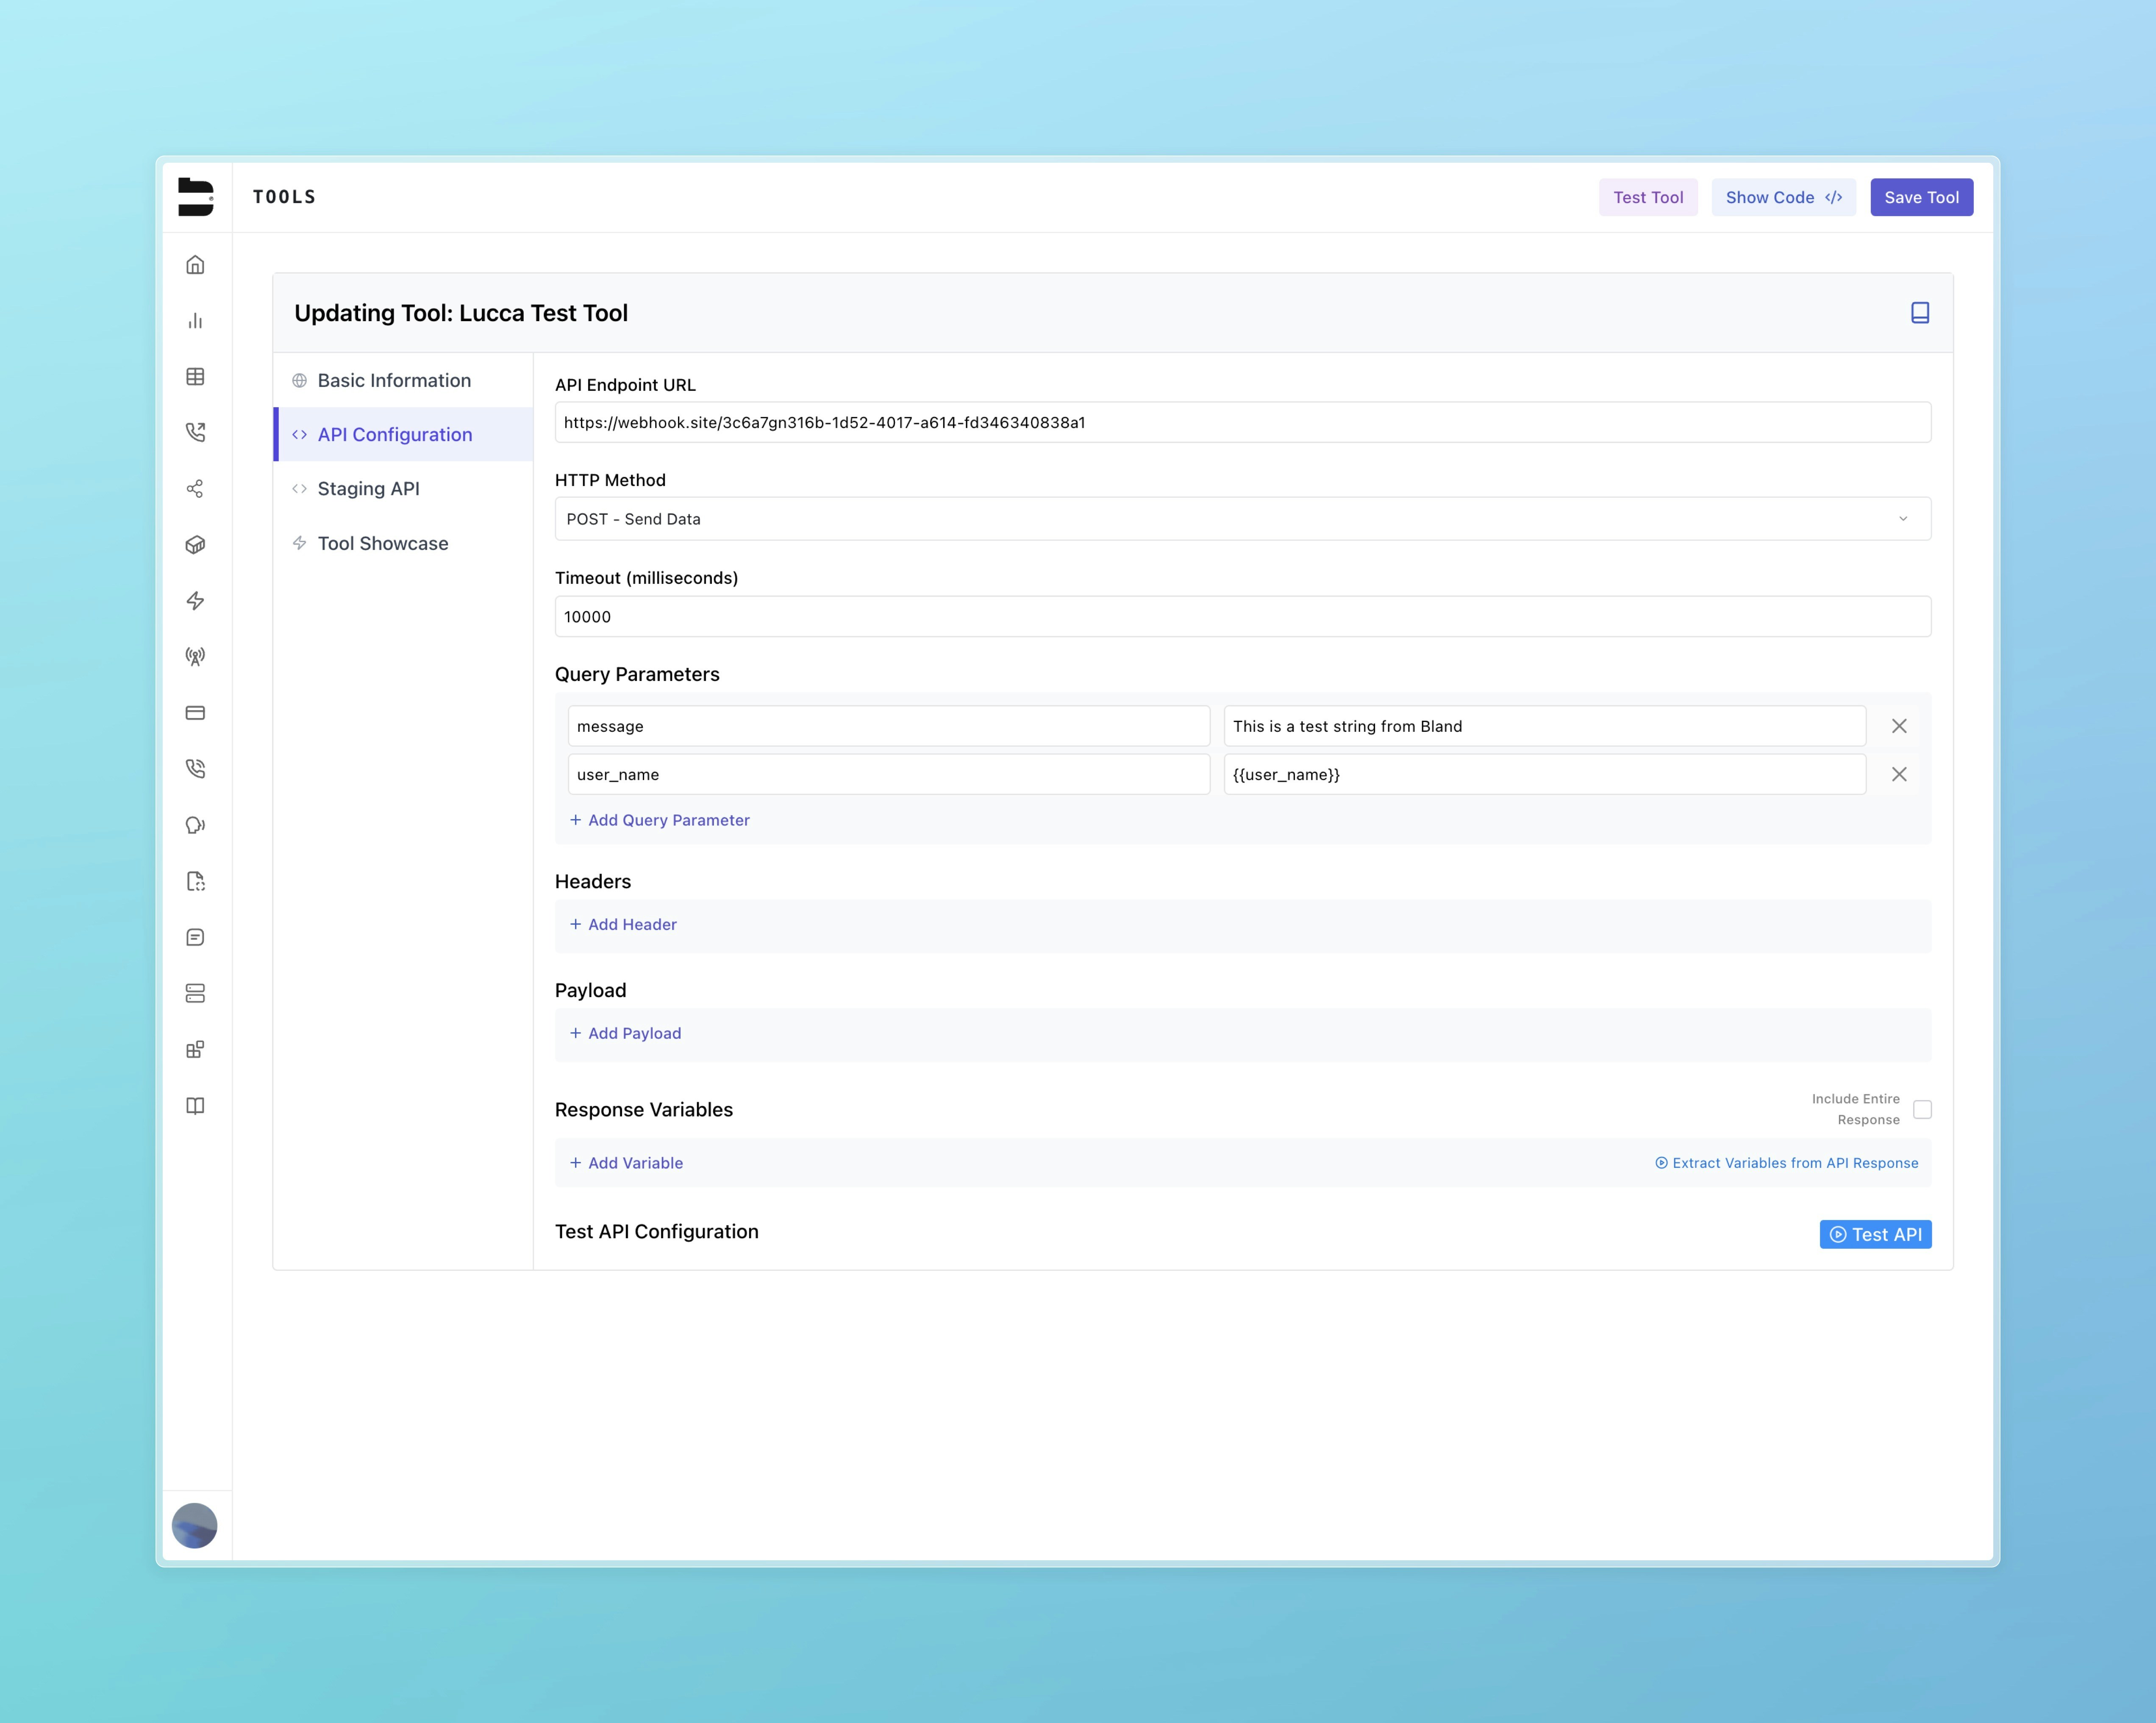
{{user_name}} with the value of the user_name collected previously in the pathway.
Headers
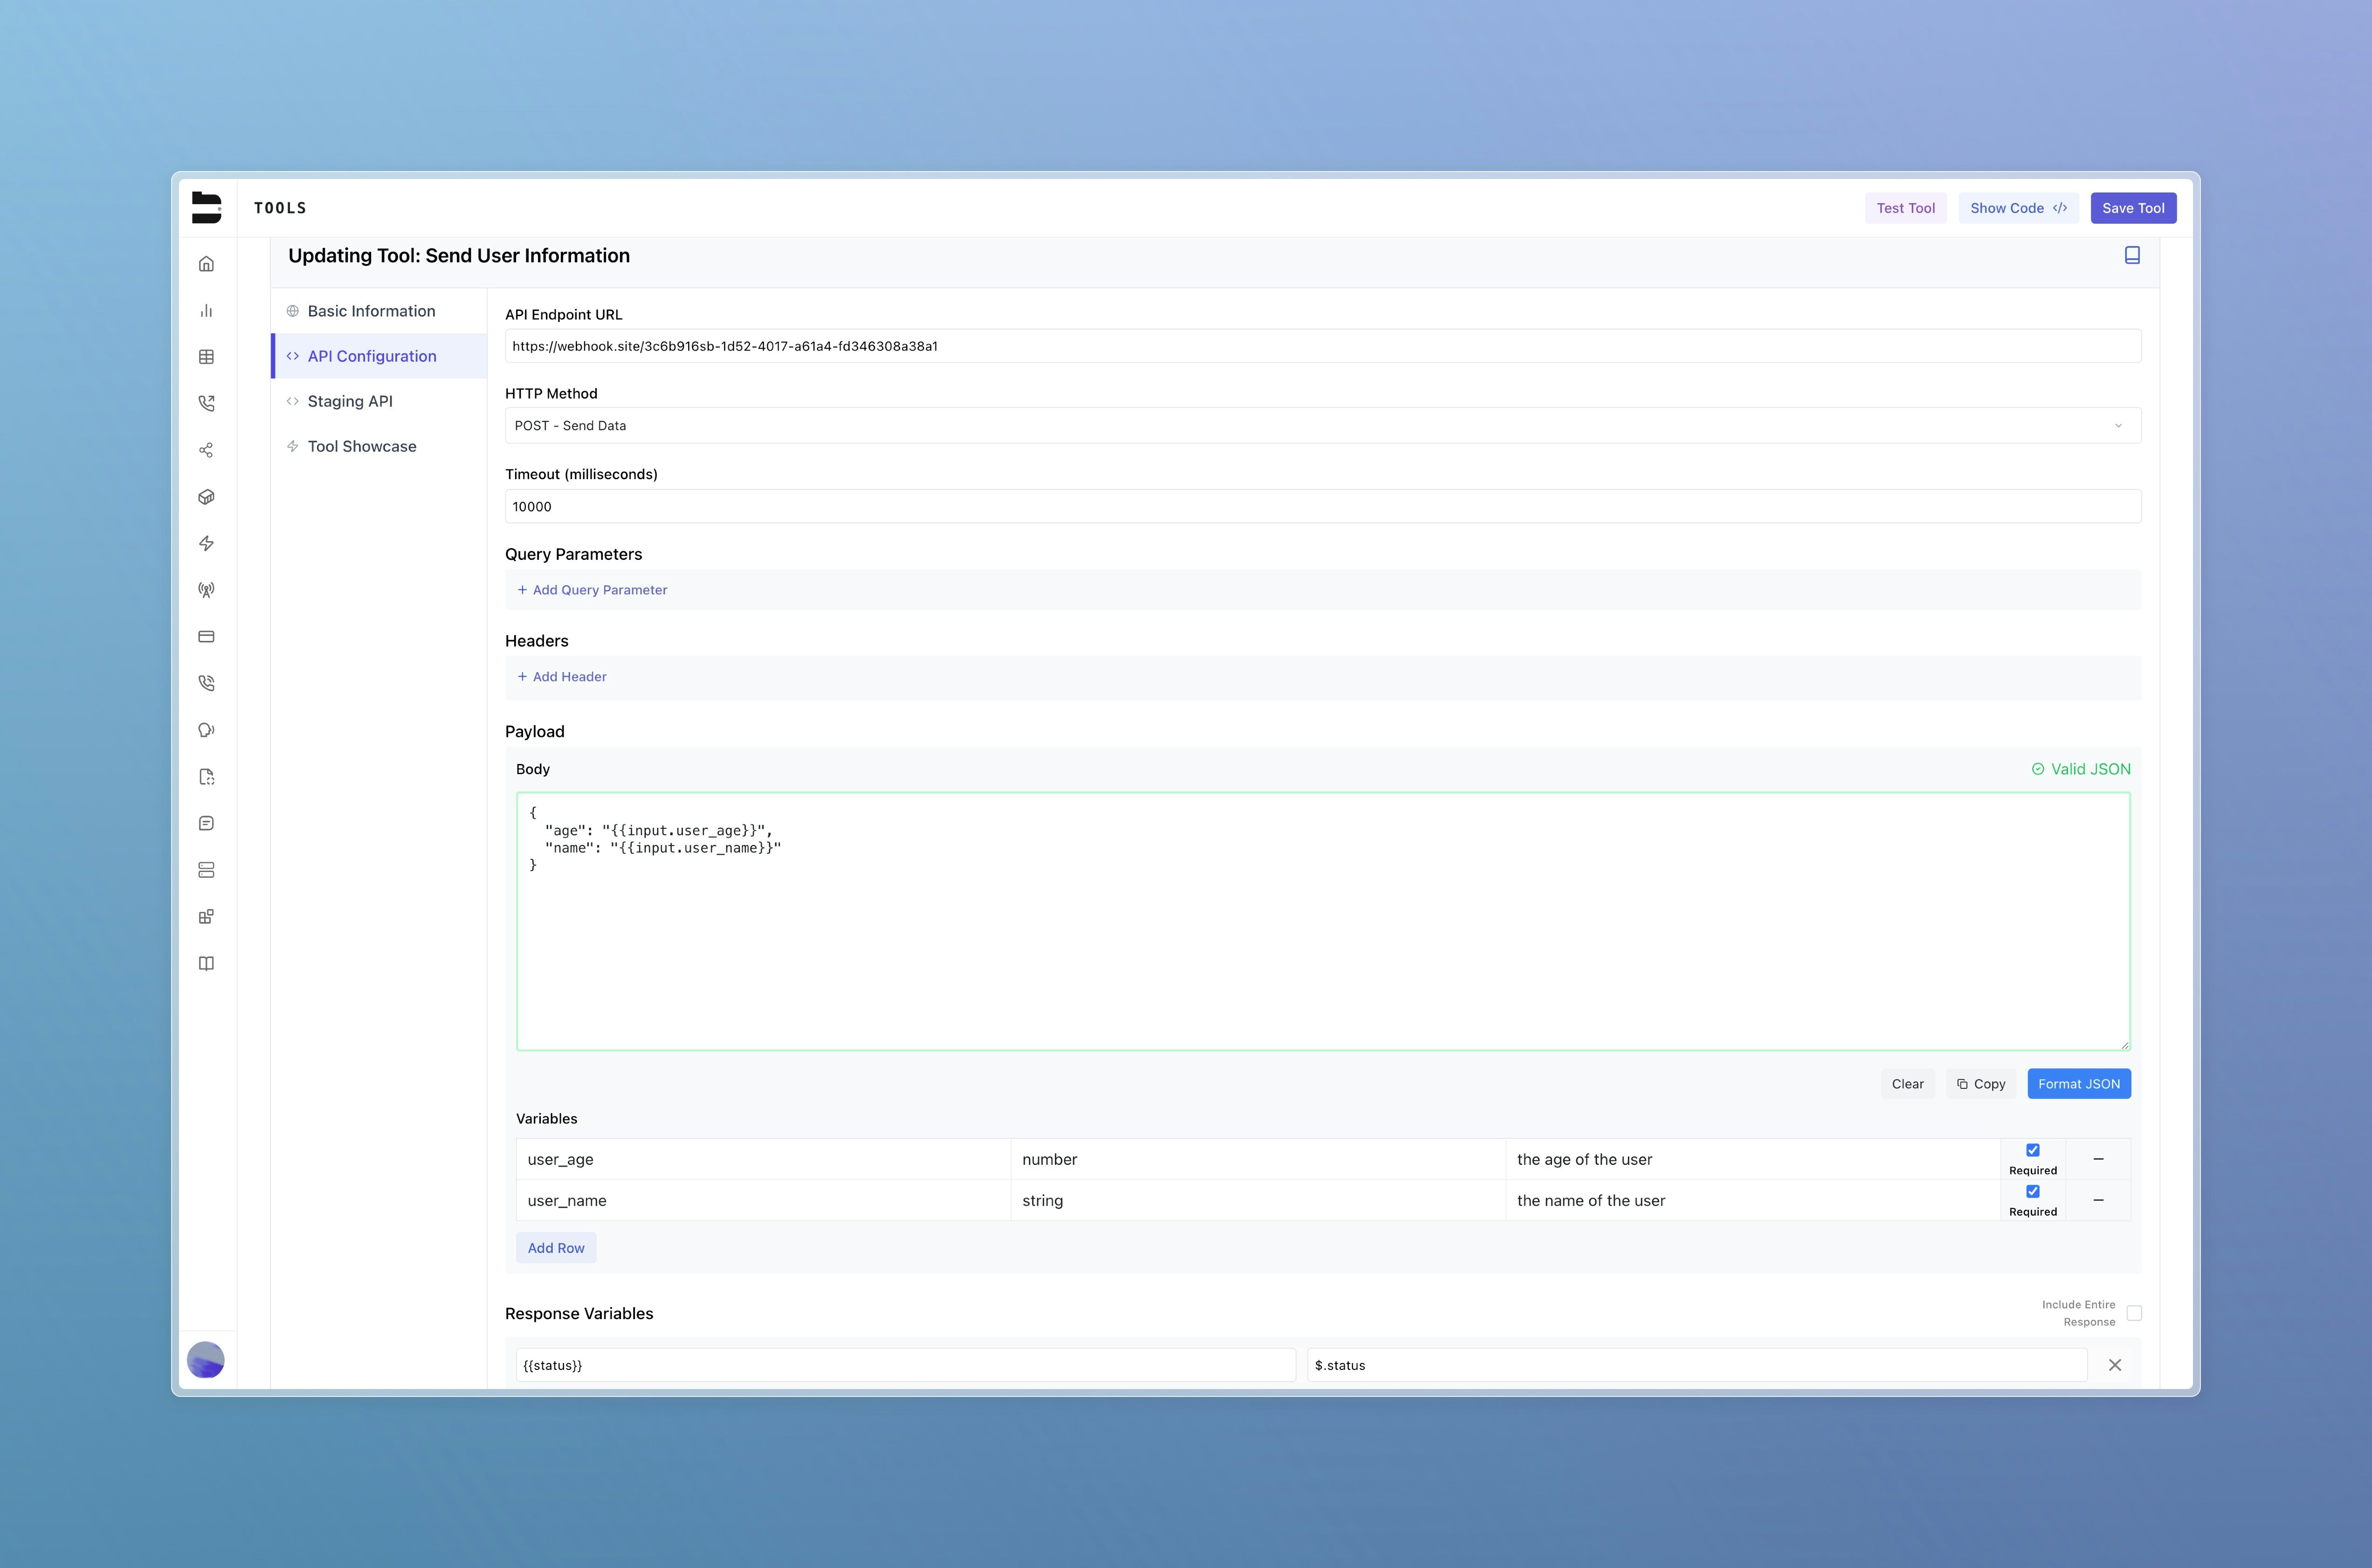
Headers can reference Bland Secrets for secure credential management.Payload
Add a JSON object to your webhook request.Variables
The variables section is for extracting variables from all the conversation up until the tool is called. For the agent to capture these variables, you must include its name, variable type, and a detailed description of what the variable is supposed to be. Once you have added the variables, you can reference them in the body payload of the custom tool with curly braces.Response Mapping
Define which fields from the response are collected to be exposed to the agent. Best practice is to have a single string for the response variable name. Use JSON path to extract the value from the response. For example, if the response is formatted:$.status and for color as $.response_object.color.
3. Staging API Configuration
- An optional alternate endpoint used for internal testing
- Mirrors the structure of the default configuration
- Toggle between live and staging versions during pathway development
4. Tool Showcase Publishing
- Choose to list your tool publicly for others to use
- Public tools appear in the global Tool Showcase with your name as the creator
Using Your Tools
There are two primary ways to apply tools in practice:1. Sending a Call with a Prompt
Within the Knowledge dropdown on the Send Call page:- You can attach one or more tools for your agent to use
- These tools are available during the call when their specific conditions are met
- In your prompt, instruct your agent on when and how to use the tool
Ask the user for their name and age.This works in tandem with your custom tool configuration:
After they give you their name and age, use your tool “Send User Information” to pass in theuser_nameanduser_ageto the custom tool.
And then let the user know the status of the custom tool when you get the response.
- The agent will naturally extract variables like
user_nameanduser_age(see below) - These can be referenced in your tool configuration using
{{input.user_name}}and{{input.user_age}} - You can extract response variables from the webhook request (e.g., status) and reference them in the conversation using double curly braces — for example,
{{status}}. These variables can then be used throughout the rest of the dialogue.
Note: You can include tools within your API requests by passing in an array of tool IDs. See API documentation for details.
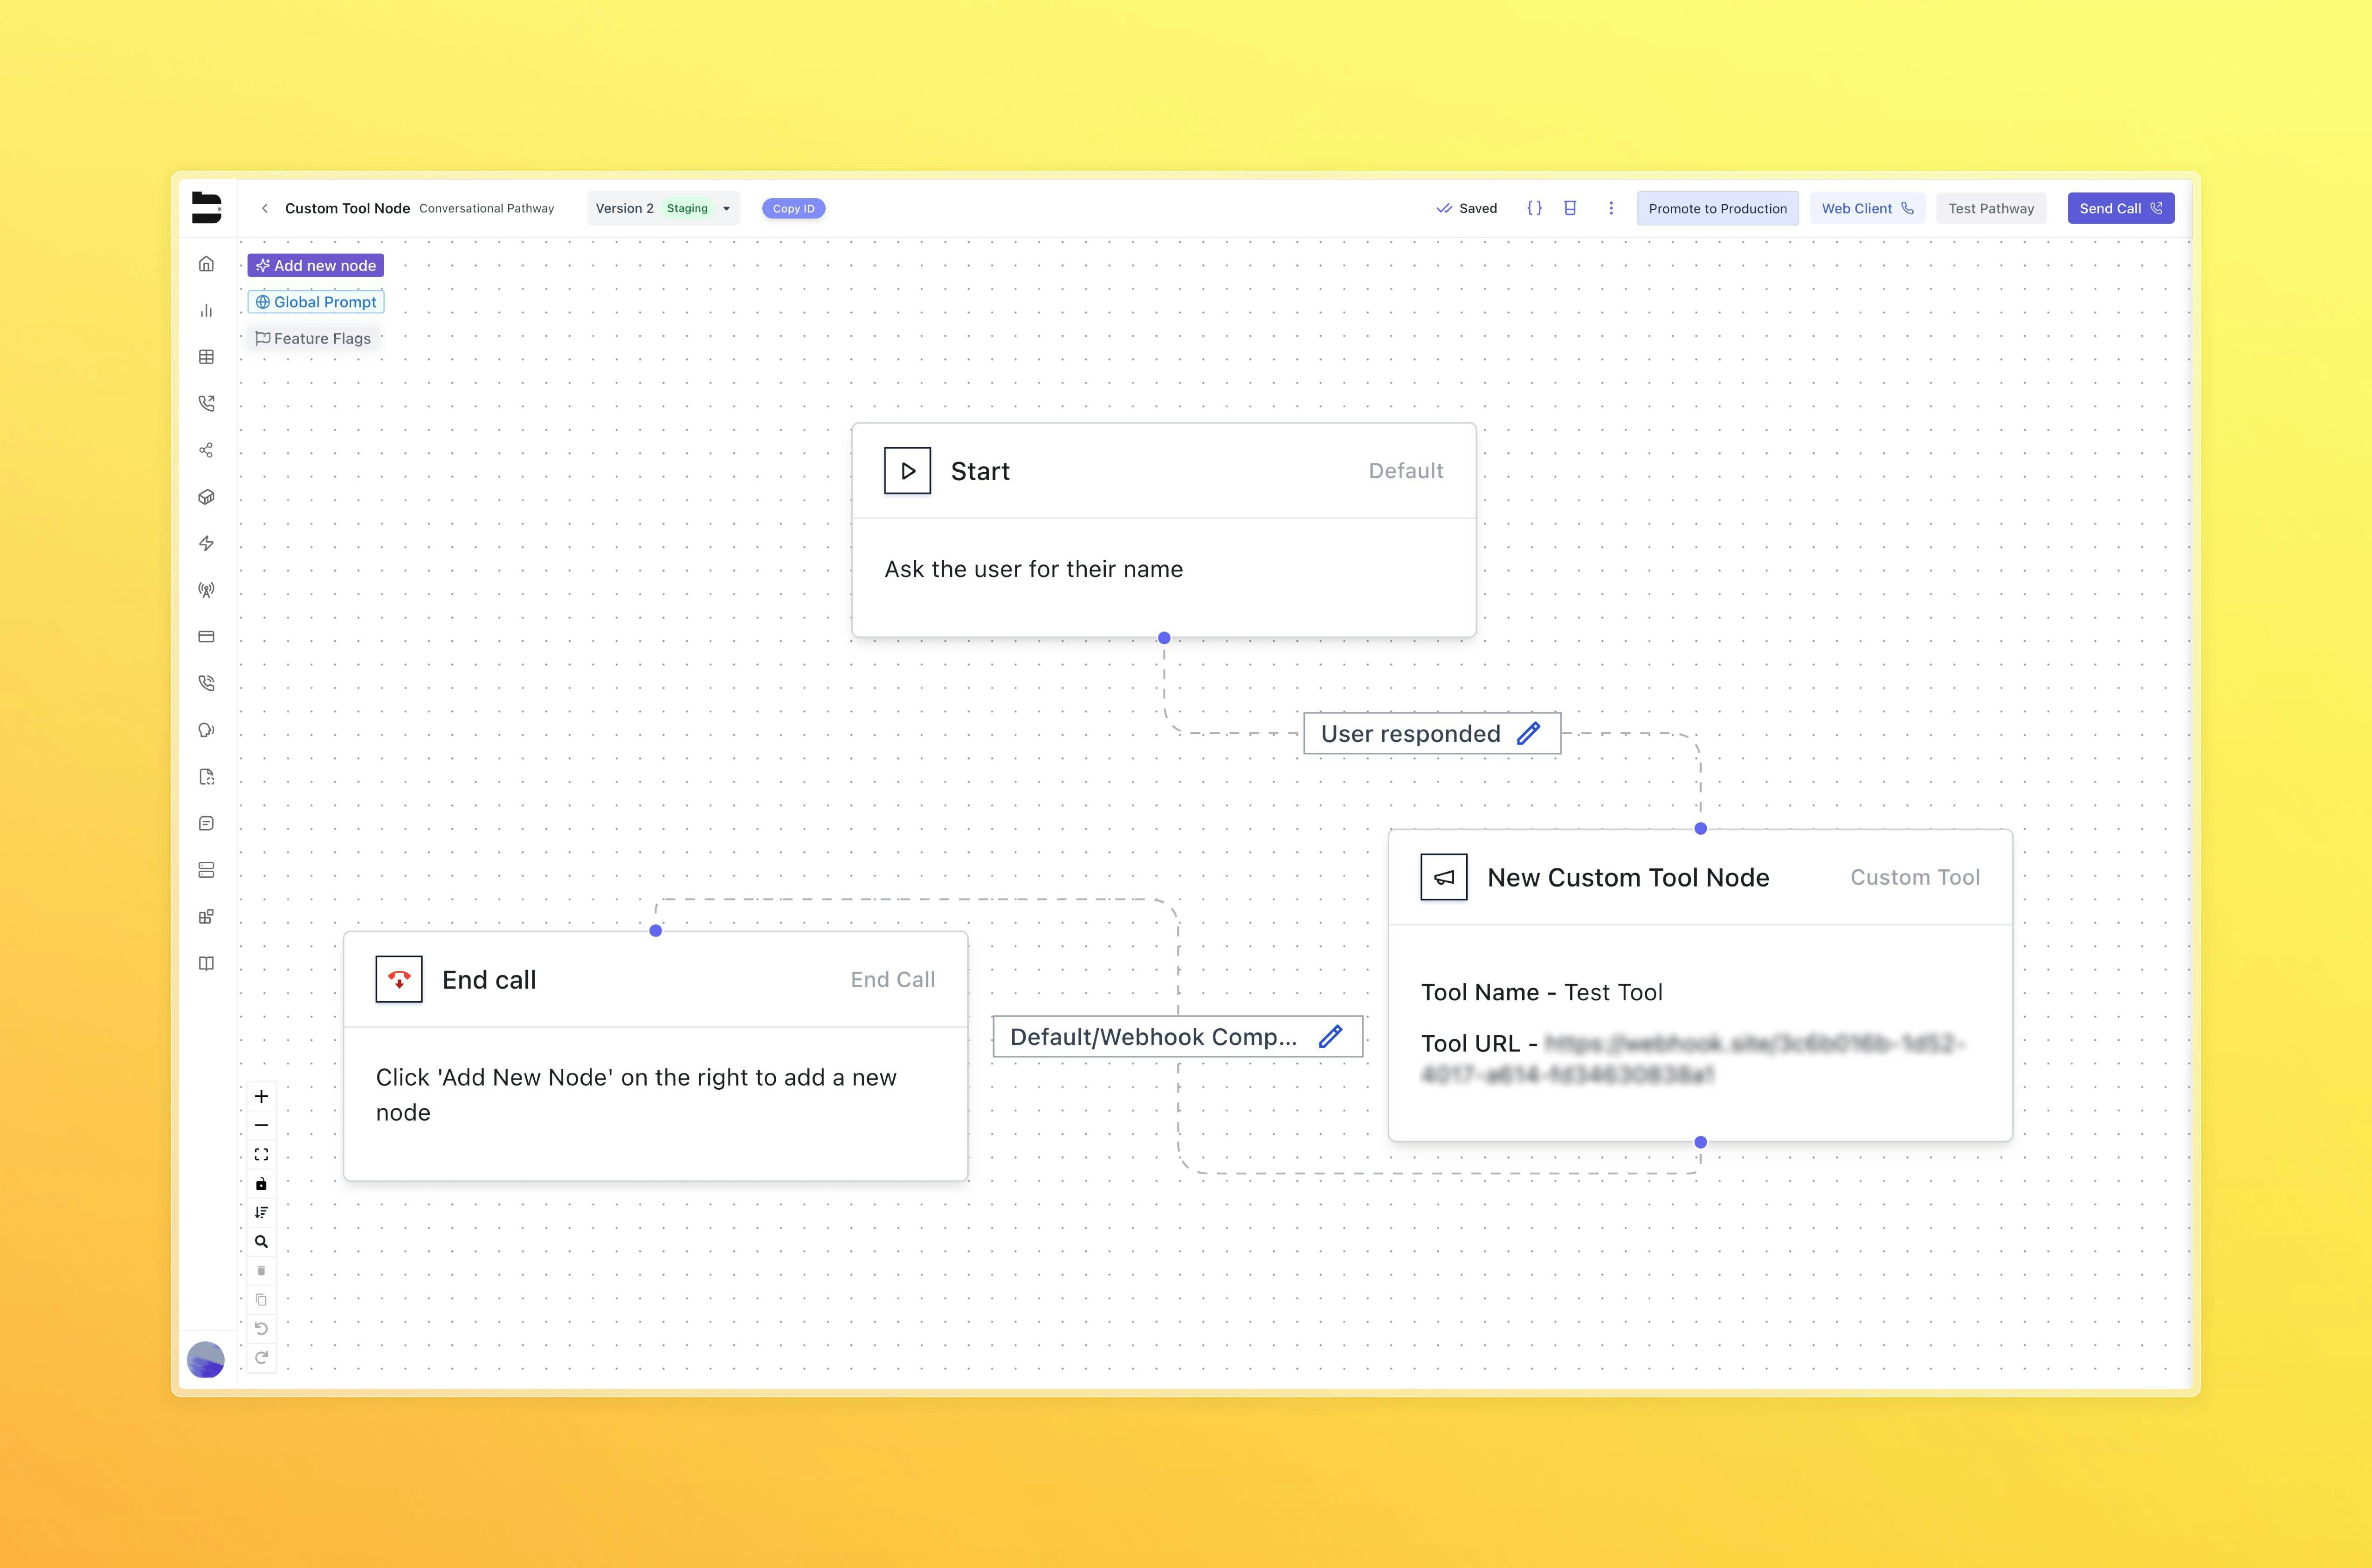
2. Inside Pathways (Custom Tool Node)
You can insert a custom tool node directly into your pathway:- Go to Add New Node → Custom Tool
- Select your tool from the dropdown
- This functions similarly to a webhook node but uses your tool’s configuration
-
From this node, you can:
- Choose between live or staging tool
- Configure response routing using After Tool Response options
- Access advanced execution settings as needed
Important: Variable extraction does not occur automatically when using a custom tool in a pathway. You must ensure that any variables needed by the tool (e.g. user_name, user_age) are extracted earlier in the pathway using variable extraction or by utilizing the variables section of the custom tool. Only variables that have been previously captured will be available to the tool at runtime.
Docs for agents: llms.txt