Introduction
Conversational pathways are our new way of prompting Bland that has led to major breakthroughs in realism.Greater dialogue control
Give your agent instructions on how it should respond at specific points of the conversation. Choose between prompting or fixed sentences.
Webhooks
Execute webhooks at any point during the conversation, and send speech during/after the webhook.
End call
Control when your agent ends the call
Knowledge Base
Connect your agent to a knowledge base, to answer any questions the user has.
Terminologies
To understand how pathways work, let’s first understand the terminologies.Nodes
These blocks you see here are called Nodes.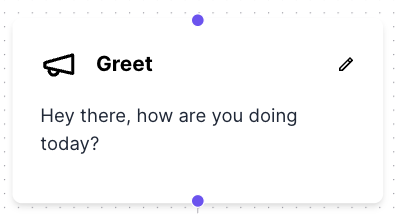
Pathways
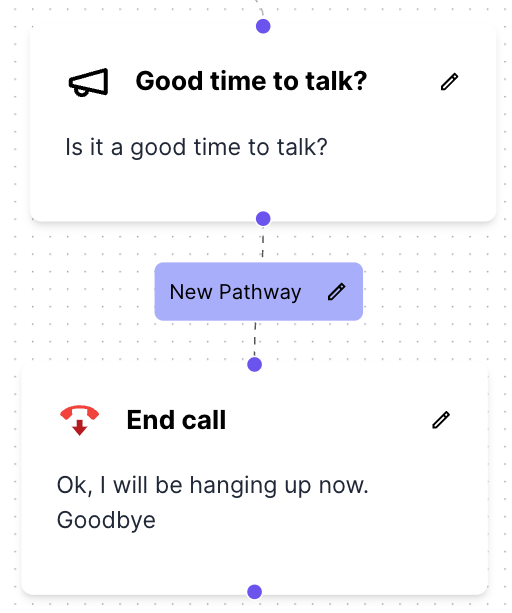
Each of these dotted lines is called a Pathway. Their start end end points are thePurple Circles on the top and bottom of the nodes.
In order to create a pathway from a node, you would click on the purple circle at the bottom of the node and drag your mouse to connect to the top purple circle another node.
Upon doing so, you will now have a new dotted line connecting the two nodes, with a ‘New Pathway’ button in the middle of the line.
How the Pathways Agent Works
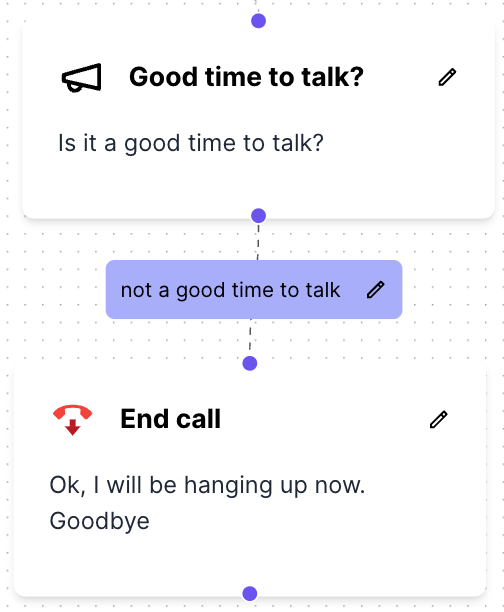
The agent starts at the first node, and then moves to the next node based on the pathway that the agent decides to take. The agent will then execute the instructions in the node as dialogue, and then move on to the next node based on the pathway that the agent decides to take. This process will continue until the agent decides to end the call. The agent will make decisions based on the labels you put in the pathways, when connecting one node to another, and the dialogue generated will be based on the instructions you set in the nodes.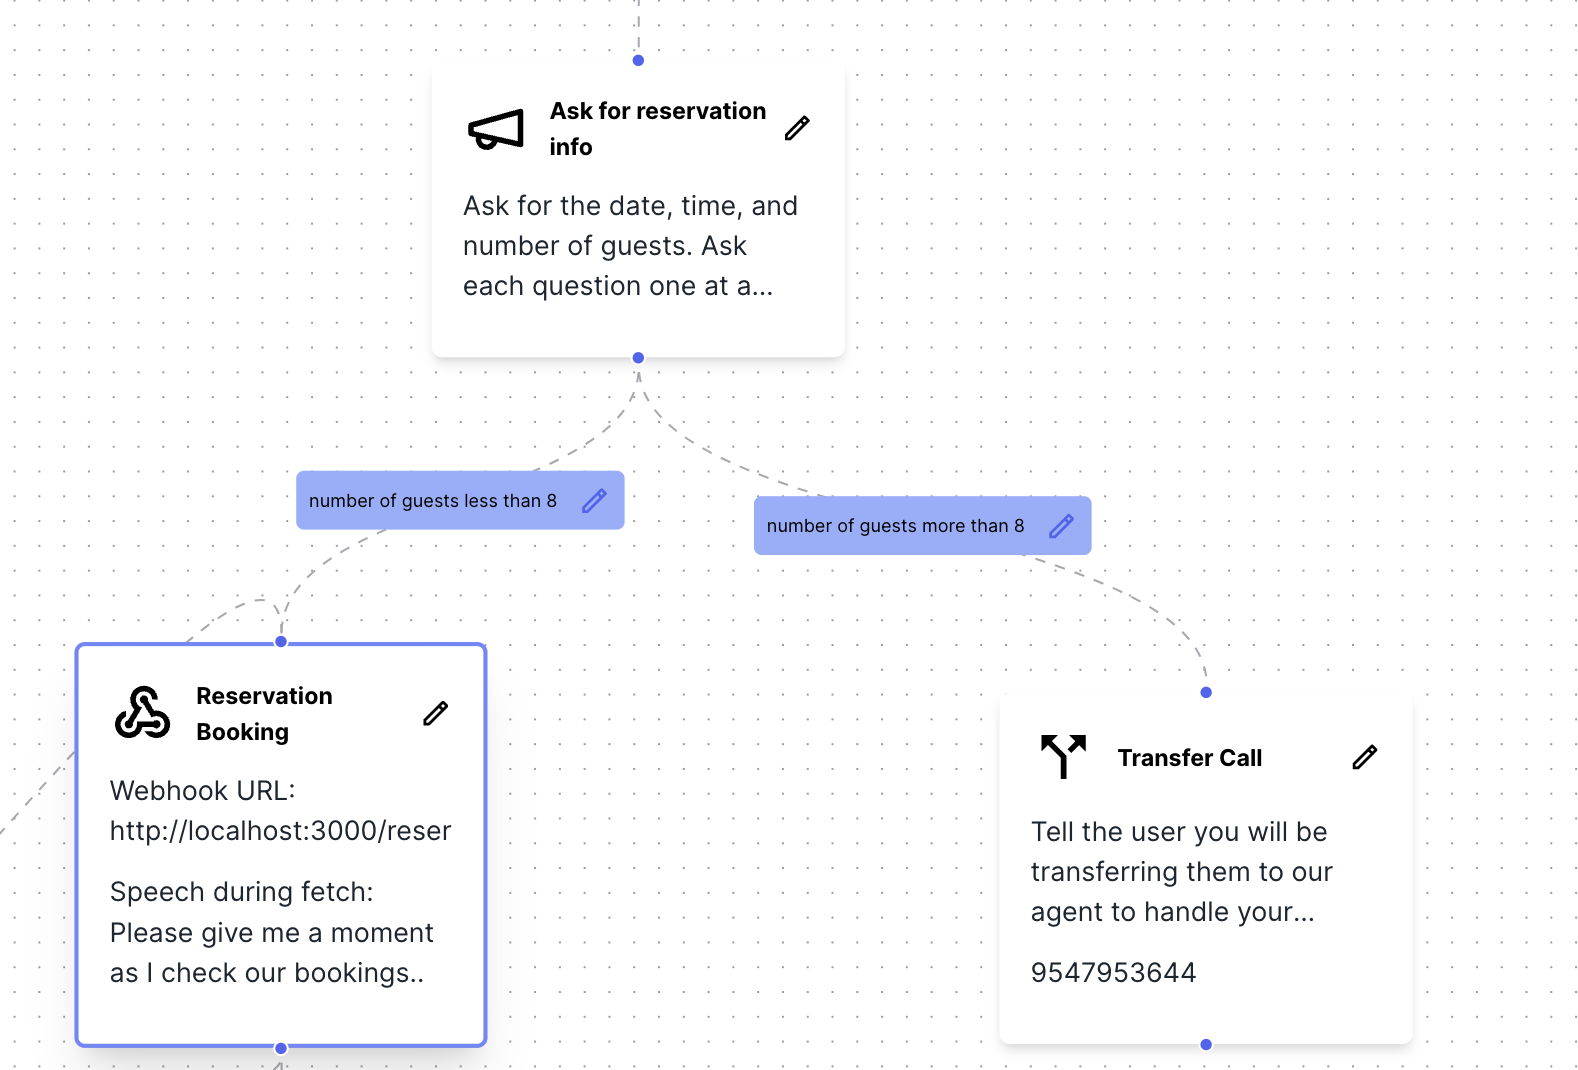
Conditions
Conditions are a way to provide the agent with a condition that must be met in order for the agent to move on to the next node. If the condition is not met, the agent will stay on the same node and ensure the condition is met until the condition is fulfilled. Using the same example above, I set the condition for the ‘Ask for reservation info’ node as follows - “You must get the date, time, and number of guests for this reservation”. This means that the agent will stay on the ‘Ask for reservation info’ node until the user provides the date, time, and number of guests for the reservation. If the user says something else or deviates from the conversation, the agent will stay on the ‘Ask for reservation info’ node and prompt the user to provide the date, time, and number of guests for the reservation. This helps you to ensure that the user provides the necessary information before moving on to the next node, and helps you to control the flow of the conversation.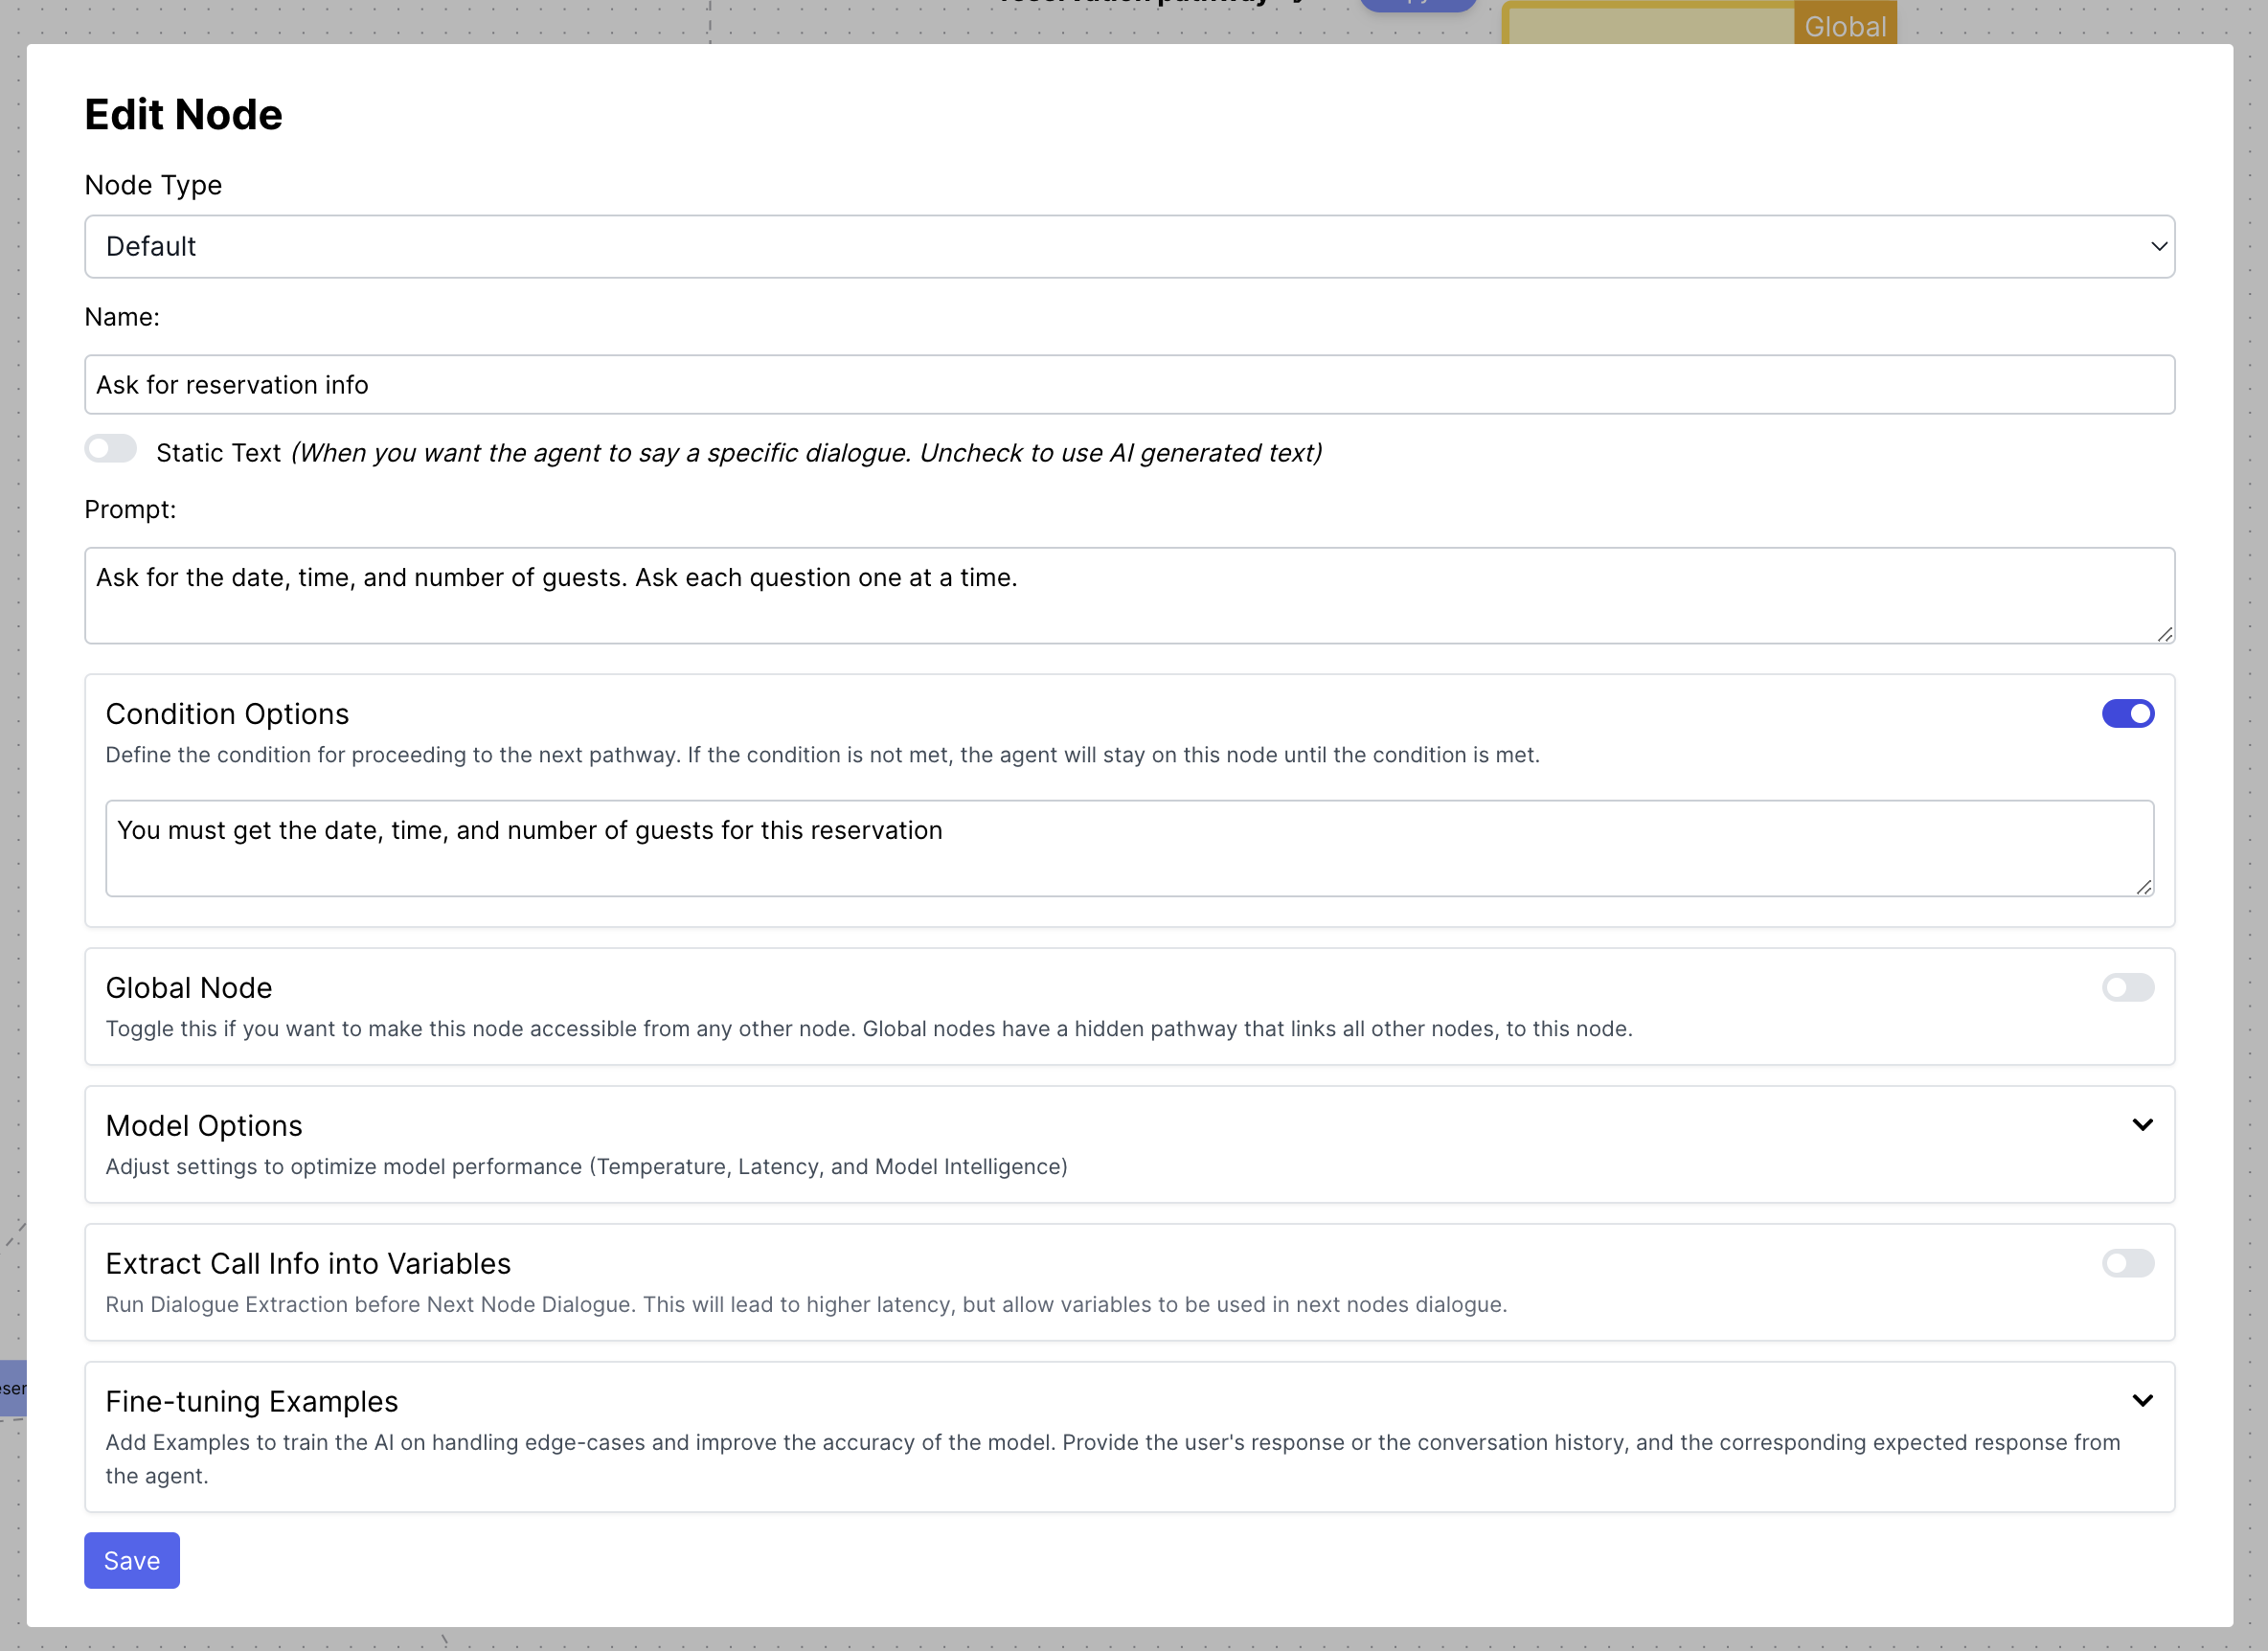
Global Nodes
{{lastUserMessage}} and {{prevNodePrompt}} can be used in the Global Node to provide the agent with context on what the user said, and steering the conversation back to its own original goal.
Example Global Node Prompt:
Example Global Node Prompt:
You are to answer any questions the user has, to the best of your knowledge. If you do not know the answer, simply say ‘I don’t have that information at that moment’. Do not make up any information/facts about the appointment.After you answer the question, you are to direct the conversation back to your initial goal, which was as follows:Previous Goal:
{{prevNodePrompt}}If you deem the goal as achieved, you can simply ask the user ‘So, shall we proceed?’ . If the goal has not been achieved, you are to steer the conversation back to achieve your goal.
If you deem the goal as achieved, simply confirm the result with the user. If the goal has not been achieved, you are to steer the conversation back to achieve your goal.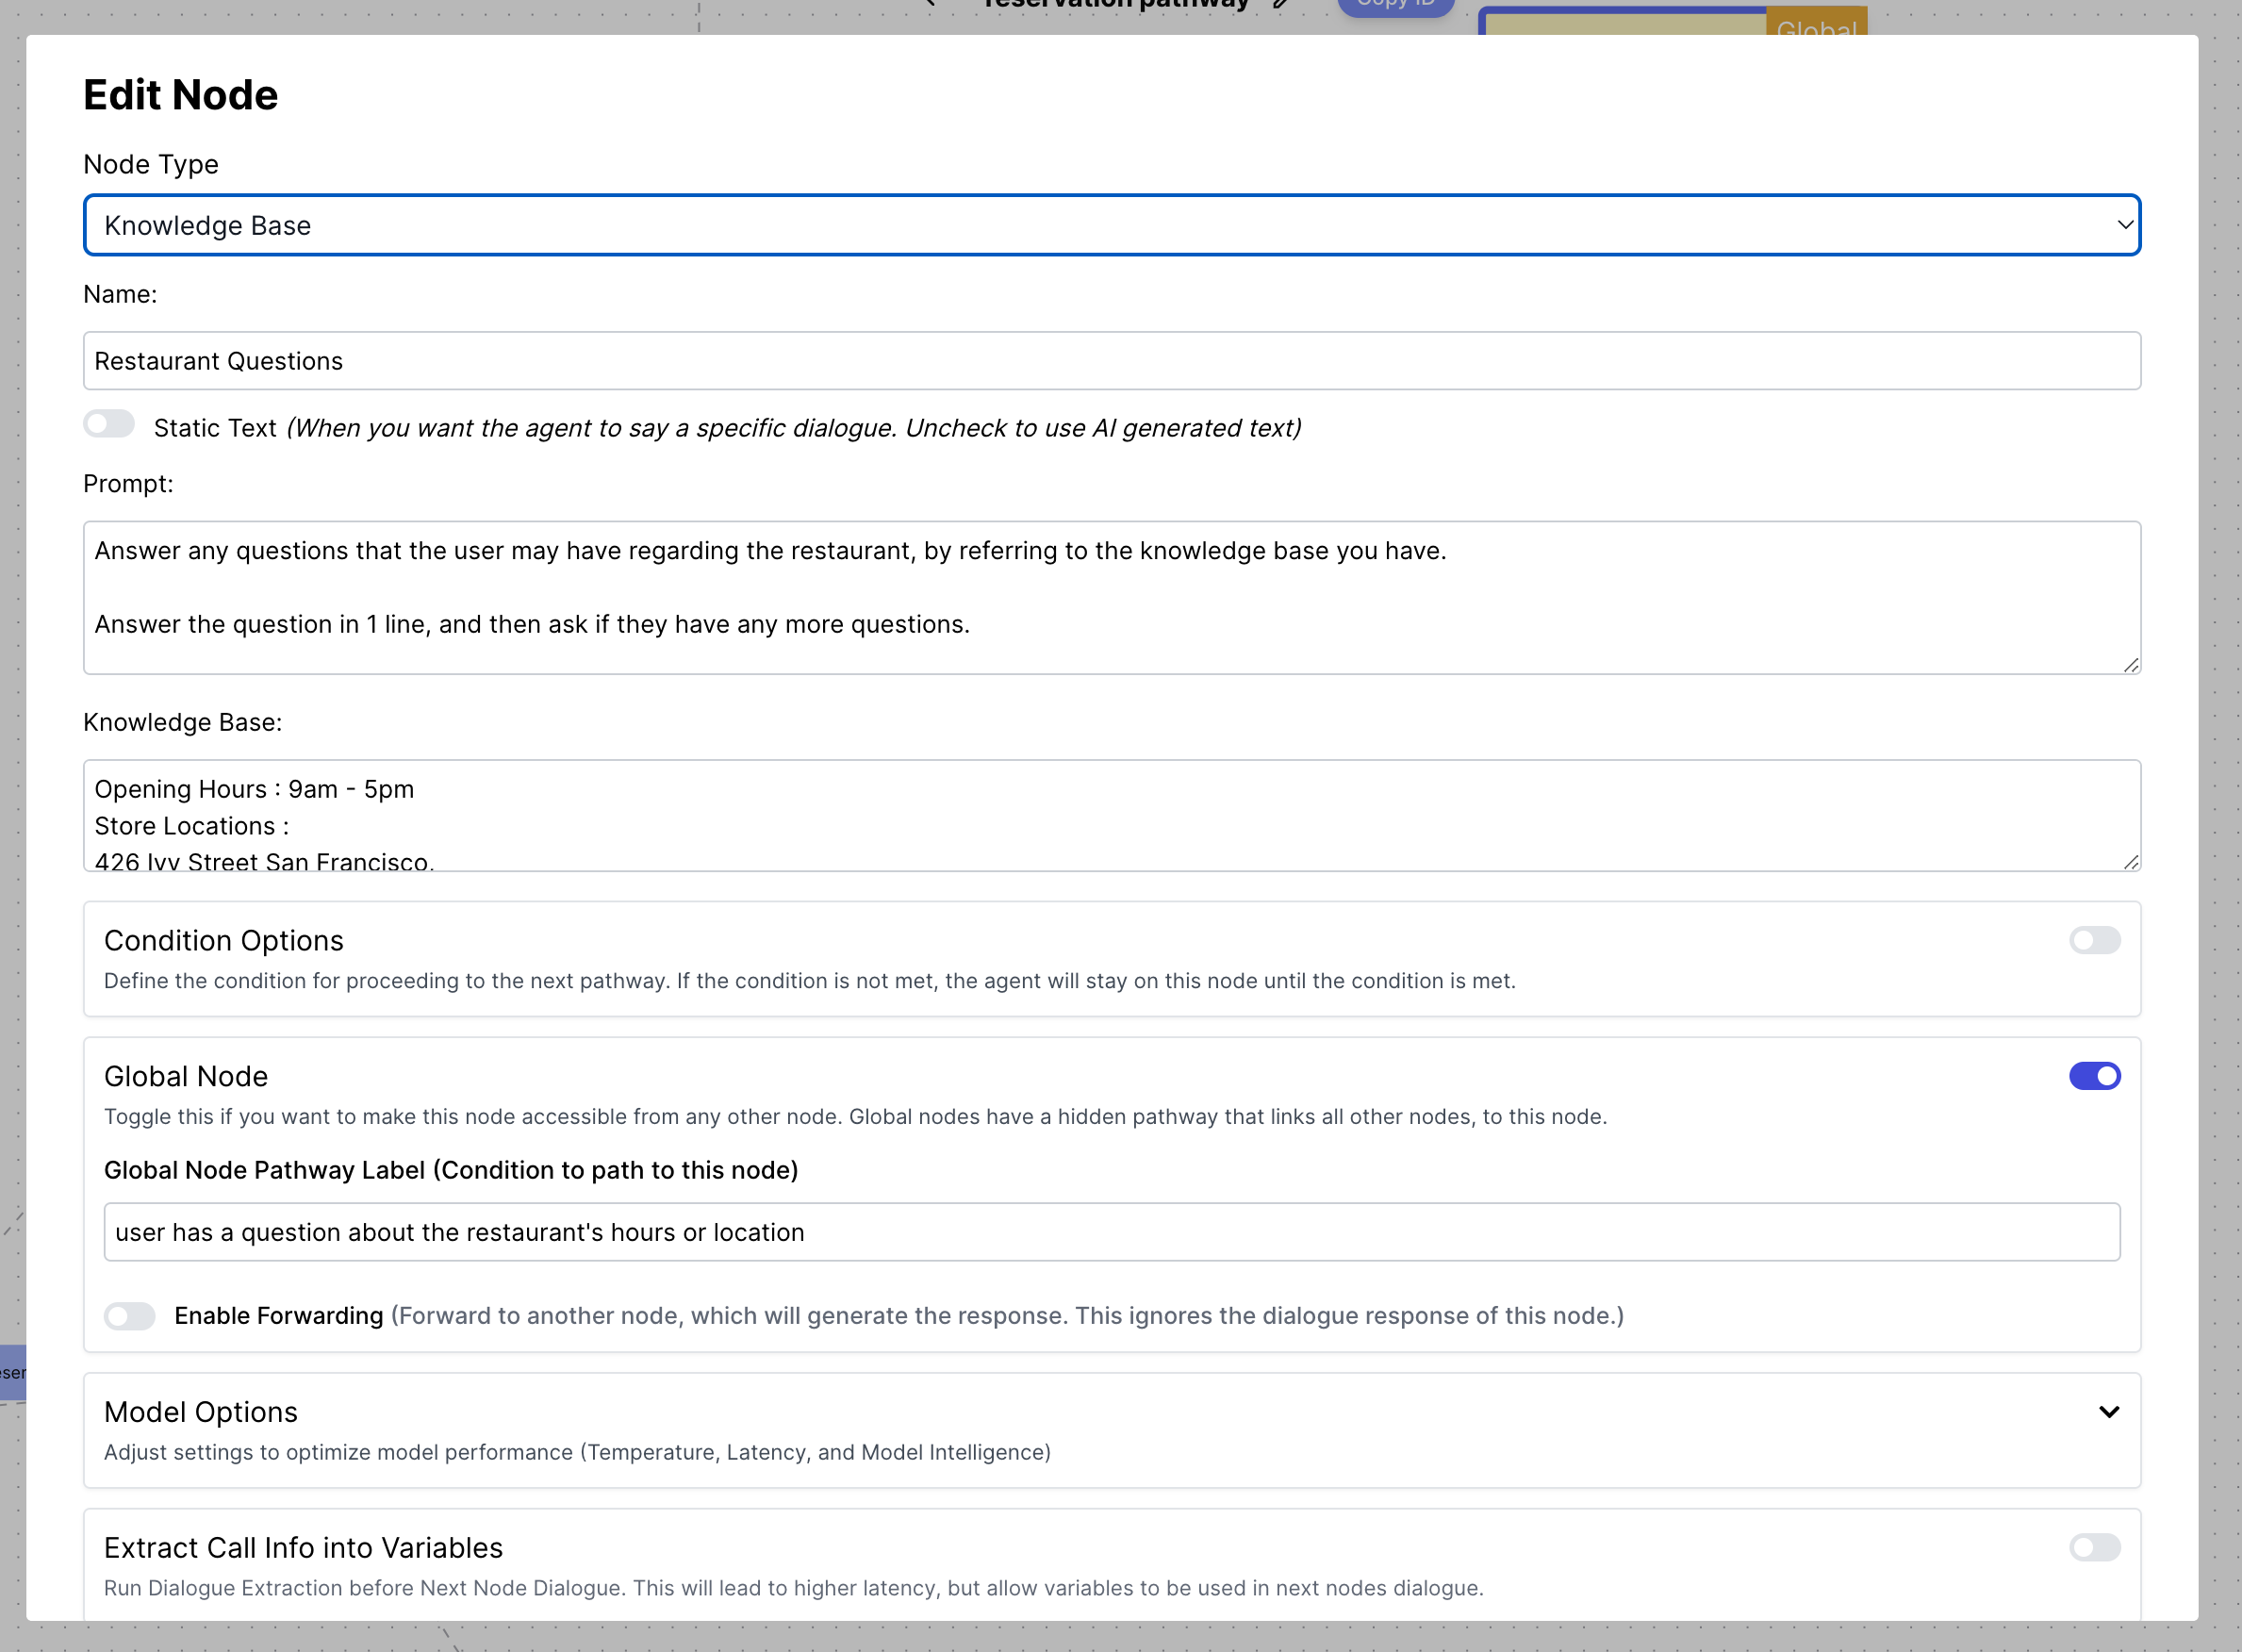
Node Types
There are currently 6 different types of Nodes- Default
- Webhook
- Knowledge Base
- End Call
- Transfer Call
- Wait for Response
Node Type.
Base/Default Node (Important!)
The default node provides the ability to generate a response to the user. This functionality is exposed to all other nodes as well. You can either:- Use the
Promptfield to give instructions on what the agent should do at this point in the conversation. This is the recommended way to generate responses as it makes the conversation more human and natural. - Enable the ‘Static Text’ toggle to provide a fixed response, and the agent will always say the same thing at this point in the conversation.
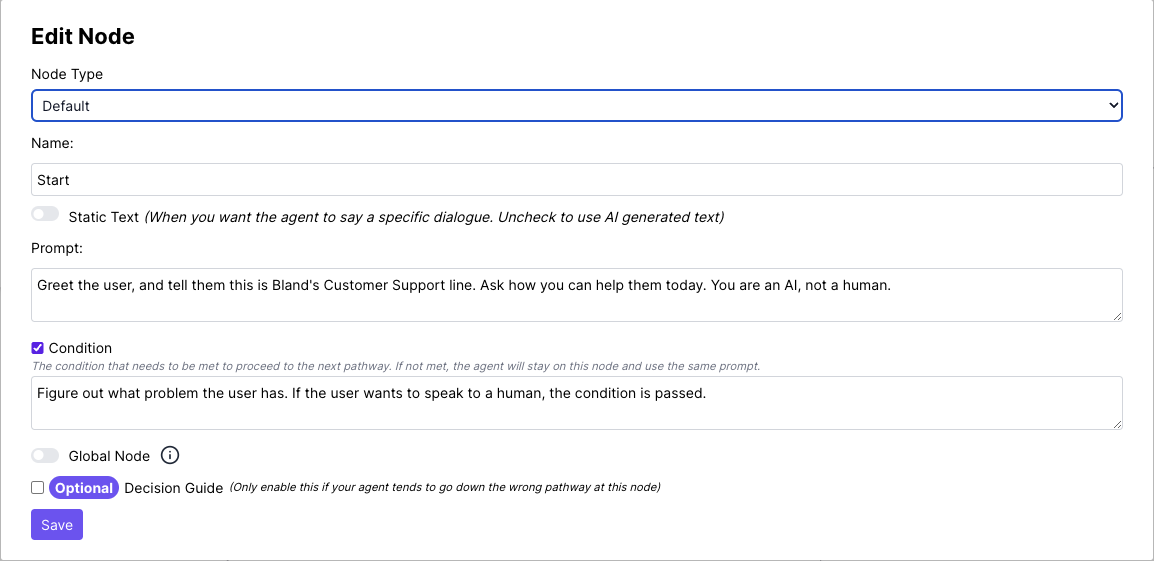
Optional Decision Guide
The optional decision guide is only to be used if your phone agent currently is not going down the correct pathway. We do not expect this to happen often, but still want to provide you the tools to handle these issues if they arise. It is a way to provide the phone agent with example scenarios of what the user might say, and what pathway the agent should take in response. You would put in examples of what the user might say in theUser Input field, and then in the Pathway field, you would provide the pathway the agent should take in response.
Condition
The condition is a way to provide the agent with a condition that must be met in order for the agent to move on to the next node. If the condition is not met, the agent will stay on the same node and ensure the condition is met until the condition is fulfilled.Global Nodes
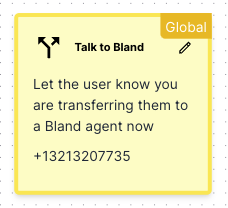
Each node can be configured to be a Global Node. Global Nodes are nodes that are accessible by every other node in the Conversational Pathway. This means that it has an implicit pathway to every other node, and the label would be the ‘Global Label’. After entering a Global Node, the agent will execute the instructions inside the Global Node, and then automatically return to the node it was at before entering the Global Node, so it can continue with the flow of the conversation. In a Global Node, you can also forward the agent to another node, by toggling the ‘Enable Forwarding’, which will allow you to select the node you want to move the agent to. This is useful if you want to move the agent to a existing node for a certain scenario, which could happen at any point in the conversation.Transfer Call Node
The transfer call node is used to transfer the call to another number when the node is reached, and the dialogue at this node is complete. As such, you may have the agent say any final words before the call is transferred.End Call Node
The end call node will end the call when the node is reached, and the dialogue at this node is complete. As such, you may have the agent say any final words before the call is ended.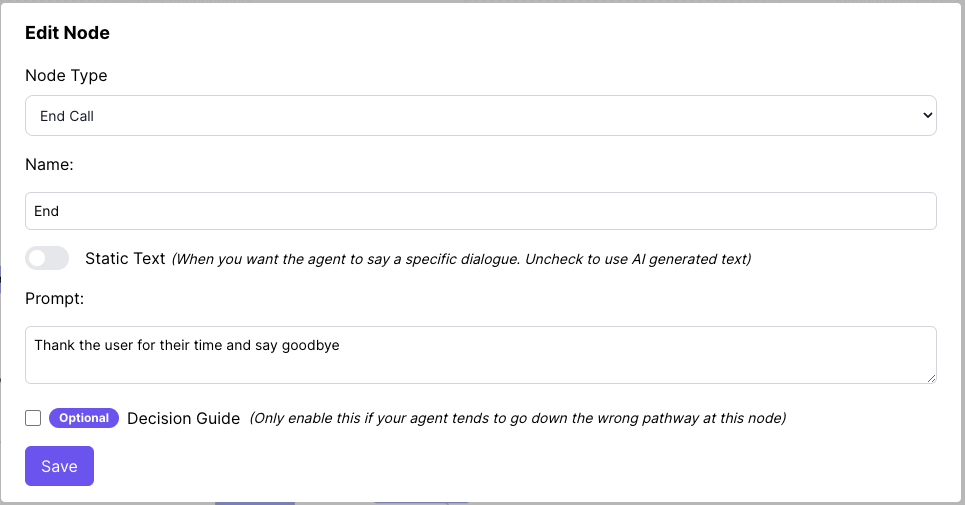
Knowledge Base Node
The knowledge base node is used to connect your agent to a knowledge base, to answer any questions the user has. Paste in any text in the ‘Knowledge Base’ field, and the agent will search through the knowledge base to answer the user. Coming soon - PDF Upload/Vector Database Integrations…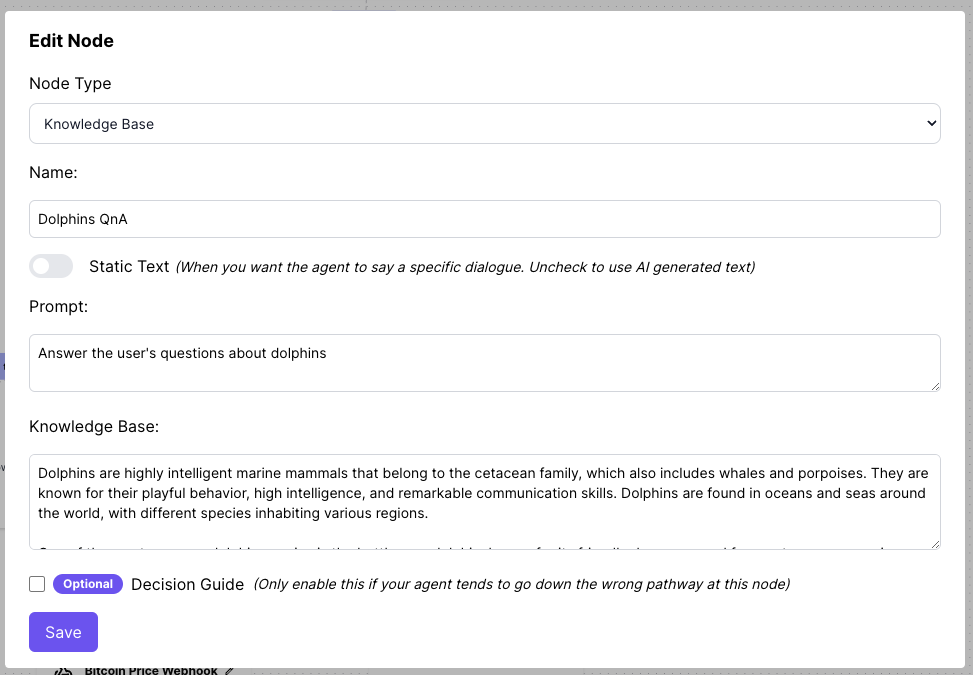
Wait for Response Node
The Wait for Response Node works the same way as the Default Node, except it is also equipped with the ability to wait if the user requires time to respond or needs to hold for a moment.Webhook Node
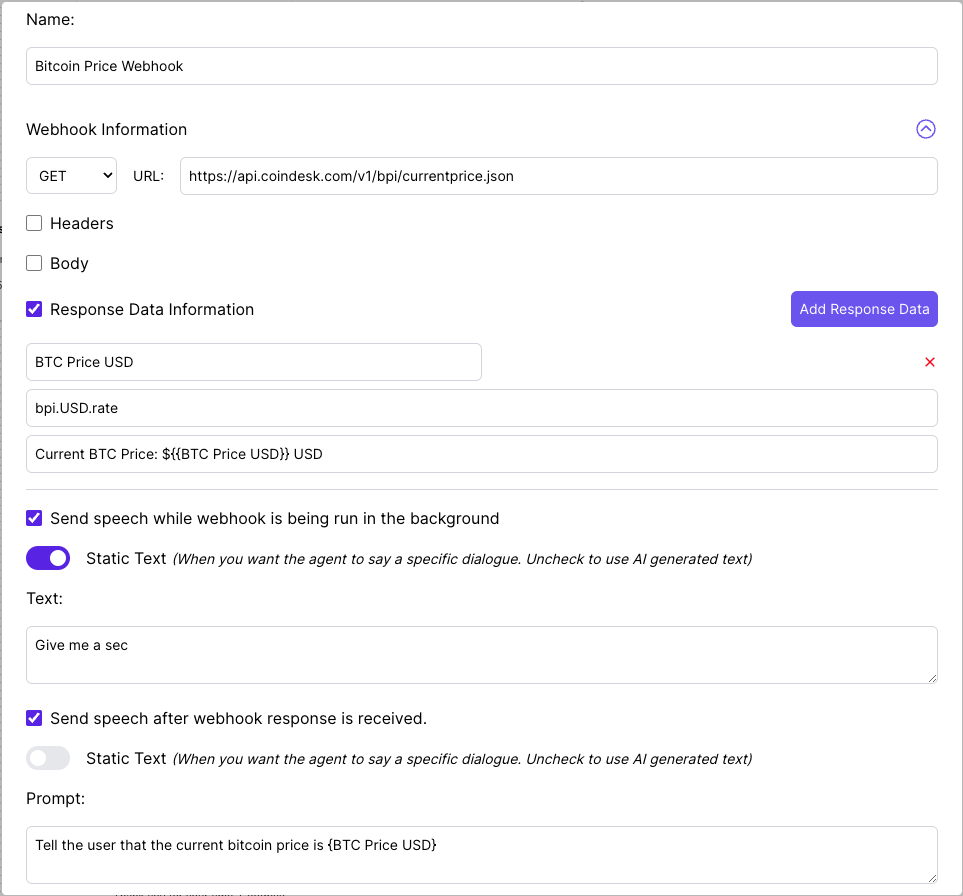
The webhook node is used to execute webhooks at any point during the conversation, and send speech during/after the webhook.Webhook Information is all you need in order to execute a webhook, and works the same way as Dynamic Data. Refer to the Dynamic Data section for more information…
Similar to how the dialogue is handled in all other nodes, you can control the dialogue sent before, and after the webhook is executed.
Variables received from the webhook can be used in the dialogue as well, as shown in the example below.
Global Prompt for all Nodes
The ‘Add Global Prompt to All Nodes’ feature is to assist in providing context/instructions to the agent for all nodes, without having to manually input the same prompt for each node. One Example of a Global Prompt could be to provide the agent with instructions on how to handle the call, the tone of voice to use, or answering any questions the user might have.
Testing the Pathway Agent
Test your pathway agent by clicking Test in the pathway toolbar. There are three testing modes: web-based chat (text or voice), sending a real call to a phone number, and per-node unit testing.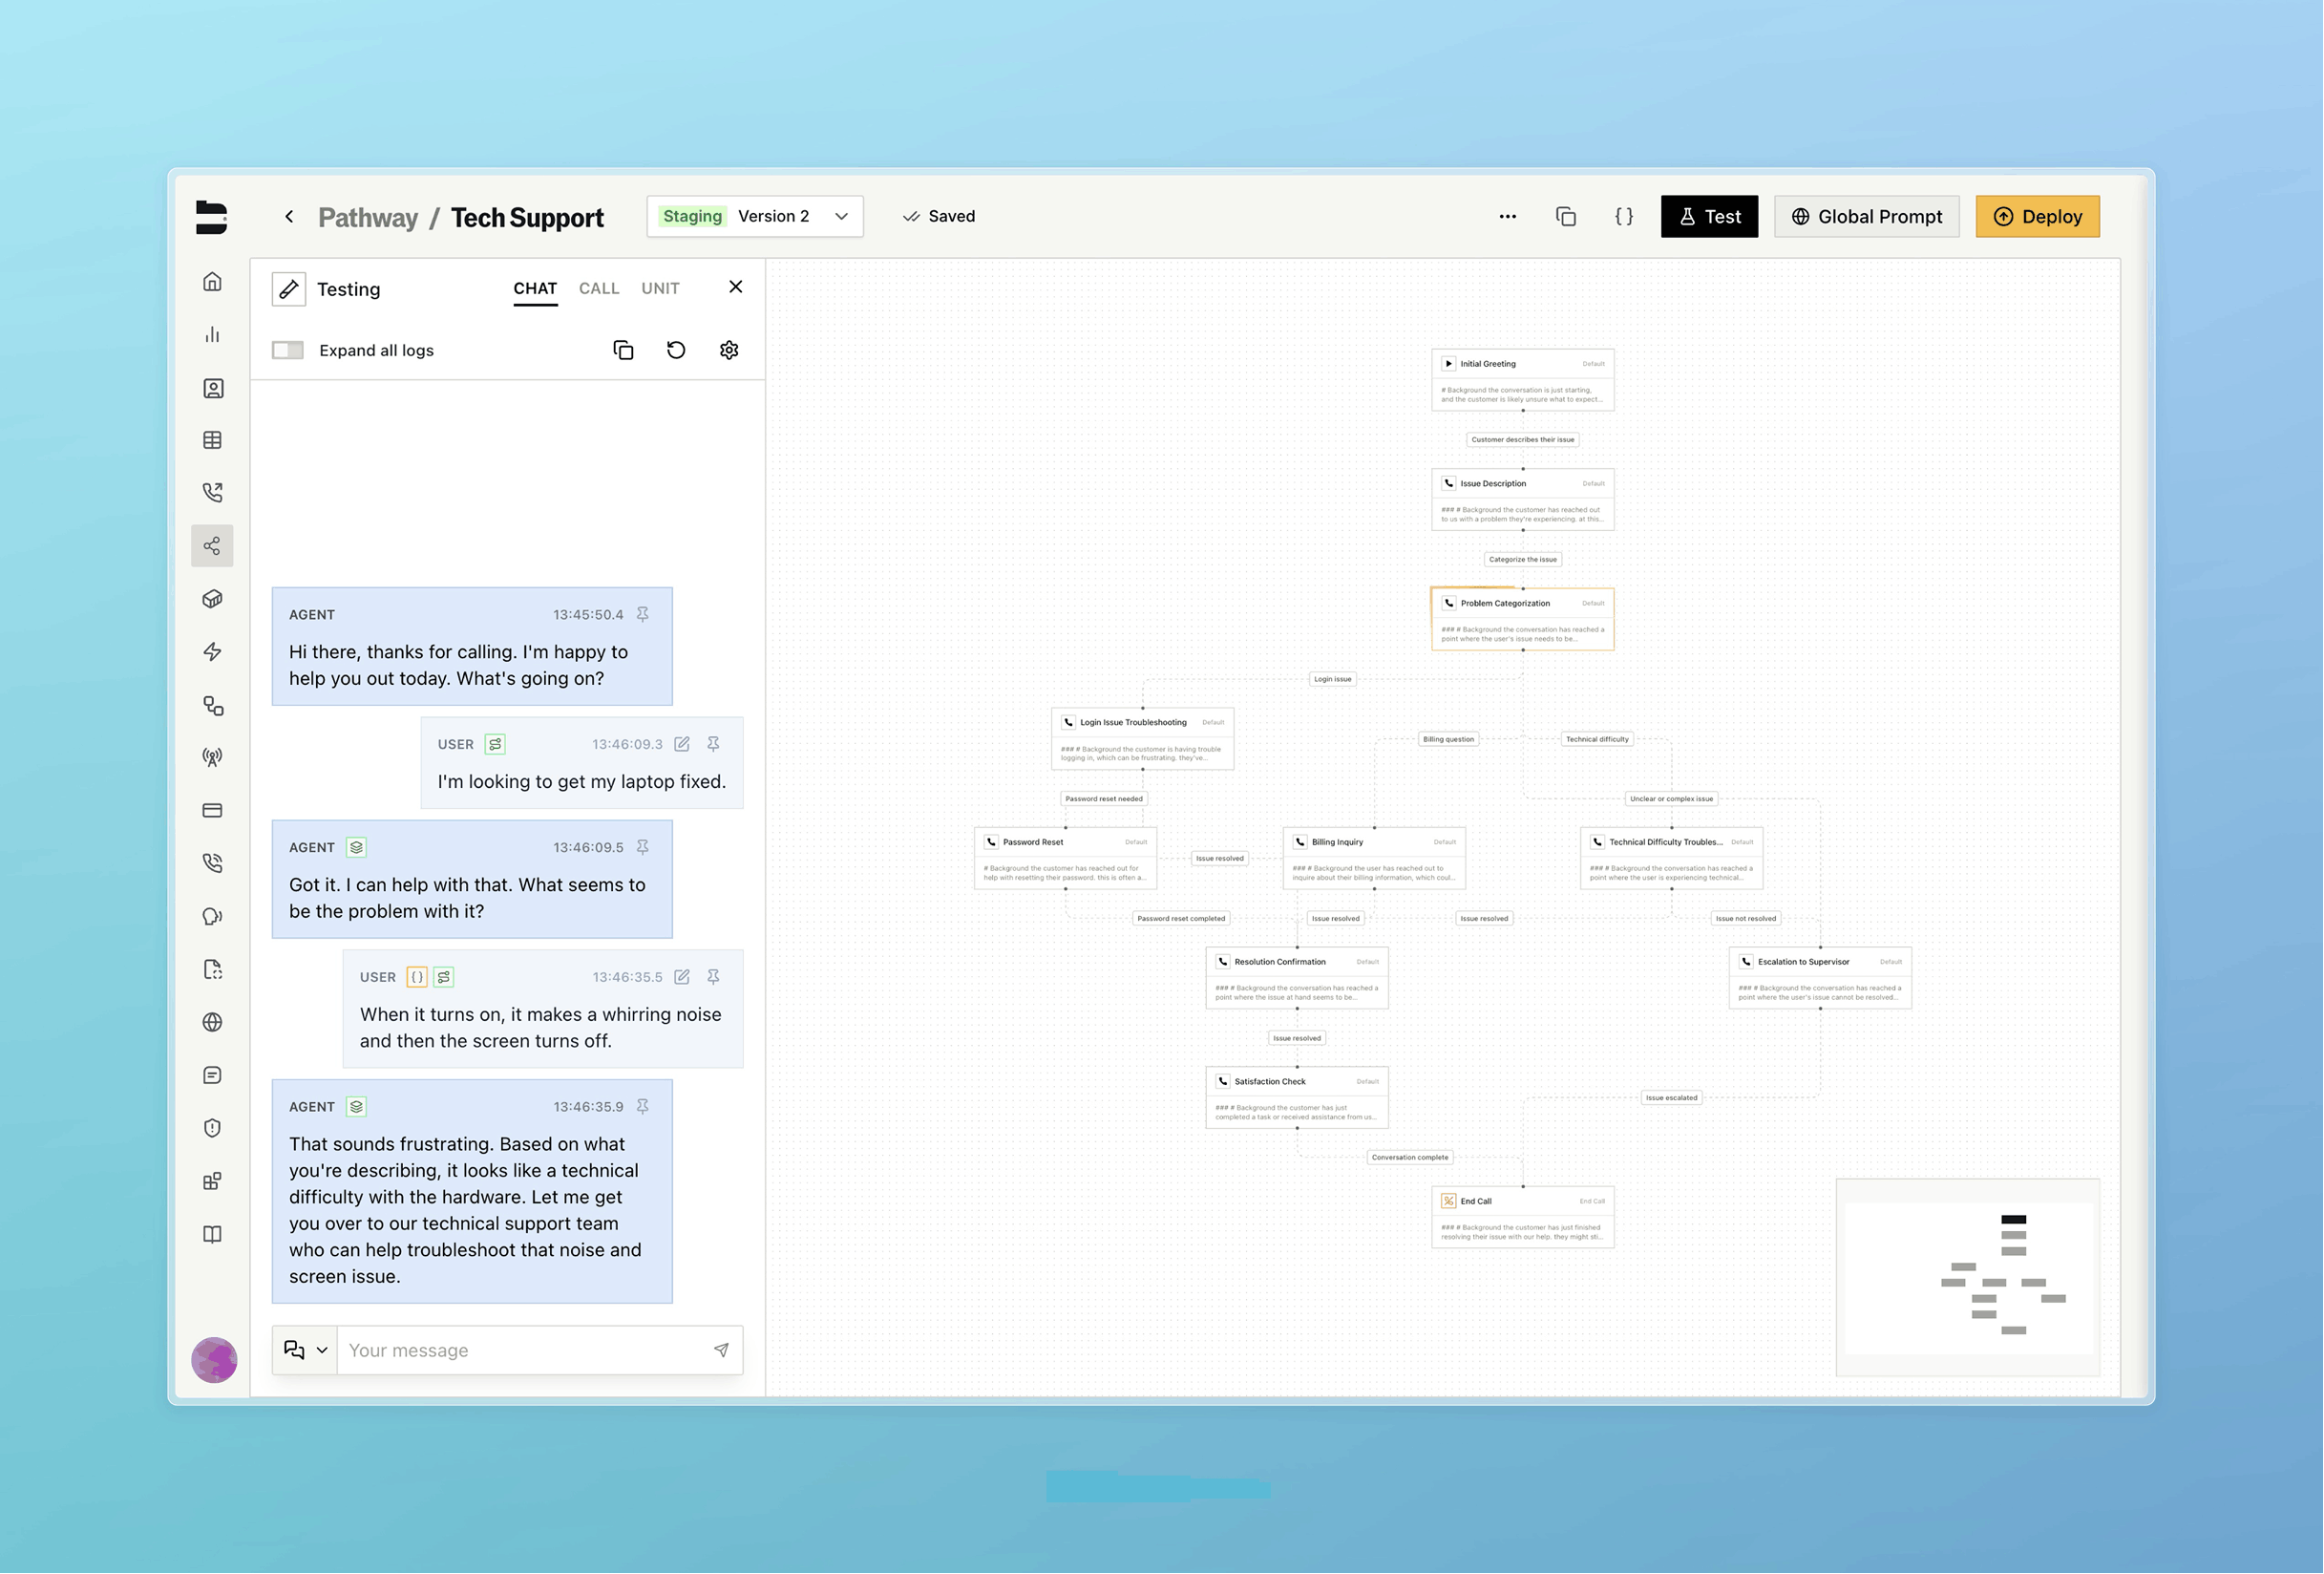
Test Configuration
Each testing mode shares a common set of configuration options:- Load configuration — Restore a previously saved test setup.
- Start node — Choose which node the conversation begins at. Defaults to the start node. Useful for testing nodes deeper in the pathway without replaying the full conversation.
- Version — Select which pathway version to test against (e.g., the current draft or a published version).
- Request data — Add key-value pairs representing context the agent should know (e.g., a caller’s name or account ID). The agent sees both keys and values, and they’re accessible via
{{variable_name}}syntax in your prompts. - Use Candidate Model — Test your pathway against a candidate model before promoting it.
- Save configuration — Save your current setup as a named configuration for reuse.
Text Chat
The most common way to test. Type messages in the input field and the agent responds as it would on a live call. Each message displays a timestamp. As the conversation progresses, you can track which node the agent moves to next — when the route and loop condition steps resolve, the log shows the destination node for the following message.Voice Chat
Switch to the Voice tab to test your agent with speech. Voice-specific configuration includes:- Voice — Select the voice the agent will use.
- Language — Choose the conversation language (e.g., English via Babel).
- Block interruptions — When enabled, prevents you from interrupting the agent while it’s speaking.
- Pronunciation Guide — Add word-level pronunciation overrides for terms the agent may mispronounce (e.g., brand names, medical terms).
Send Call
Click Send call to trigger a real phone call using your pathway configuration. The call behaves identically to a production call, and logs appear in the testing panel in real time.Branching
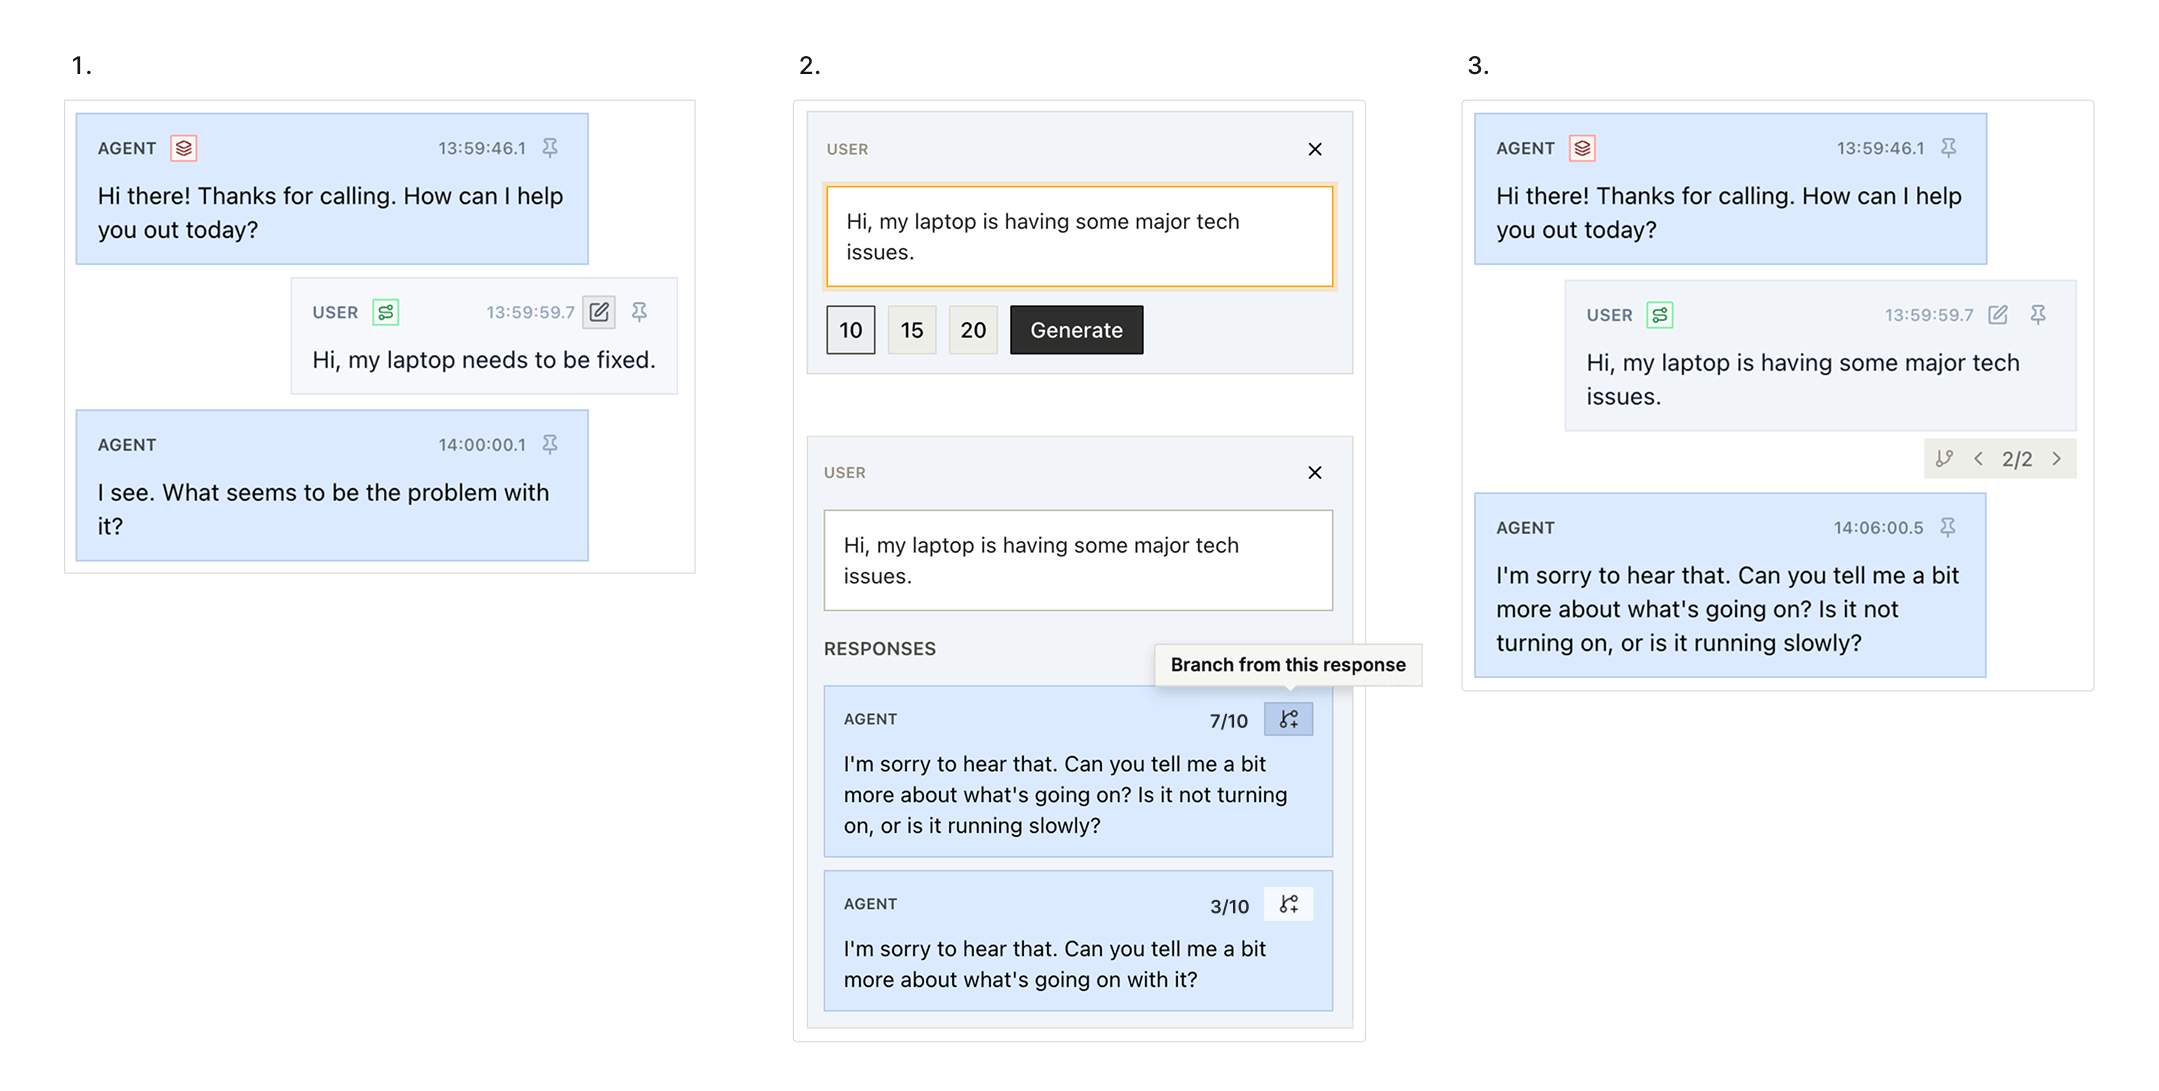
In any chat mode, you can branch a conversation from any user message to explore how the agent handles a different input at that point. To create a branch, click the edit icon on a user message, change the text, and submit it. The agent generates new responses based on the updated message, and the conversation continues from that point forward. The original branch is preserved — you can swap between branches using the arrow controls that appear on the branched message (e.g.,1/2).
This is useful for quickly testing how the agent responds to variations of a user message without restarting the conversation from the beginning.
Expanded Call Logs
Click Expand all logs to see detailed per-turn decision data for any test conversation. Each turn shows the following sections when relevant: Variable extraction — Displays the extraction type and results. When variables are successfully extracted, their names and values appear (e.g.,party_size: 8, appointment_time: 9:30 AM). The full list of available variables from previous nodes is also shown, along with the node each variable originated from.
Loop condition — Shows whether the loop condition was evaluated and its result. Includes the full loop condition prompt and a likelihood score (e.g., Likely 7/10). This is the only prompt shown directly in the expanded logs — node prompts and the global prompt are accessible from the node editor panel and the global prompt window respectively. When the condition is not yet met, the agent remains on the current node.
Route — Displays which outgoing pathway the agent chose and the other available options it could have taken.
Interruption — When a user interrupts the agent, the log shows the interruption event, including which node the agent returned to.
Webhook — For nodes that trigger webhooks, the log shows the URL, HTTP response status, response time, and the full response payload.
Unit Testing
- Select a node — Choose the node you want to test from the dropdown.
- Select a Call ID — Pick a historical call to use as conversation context.
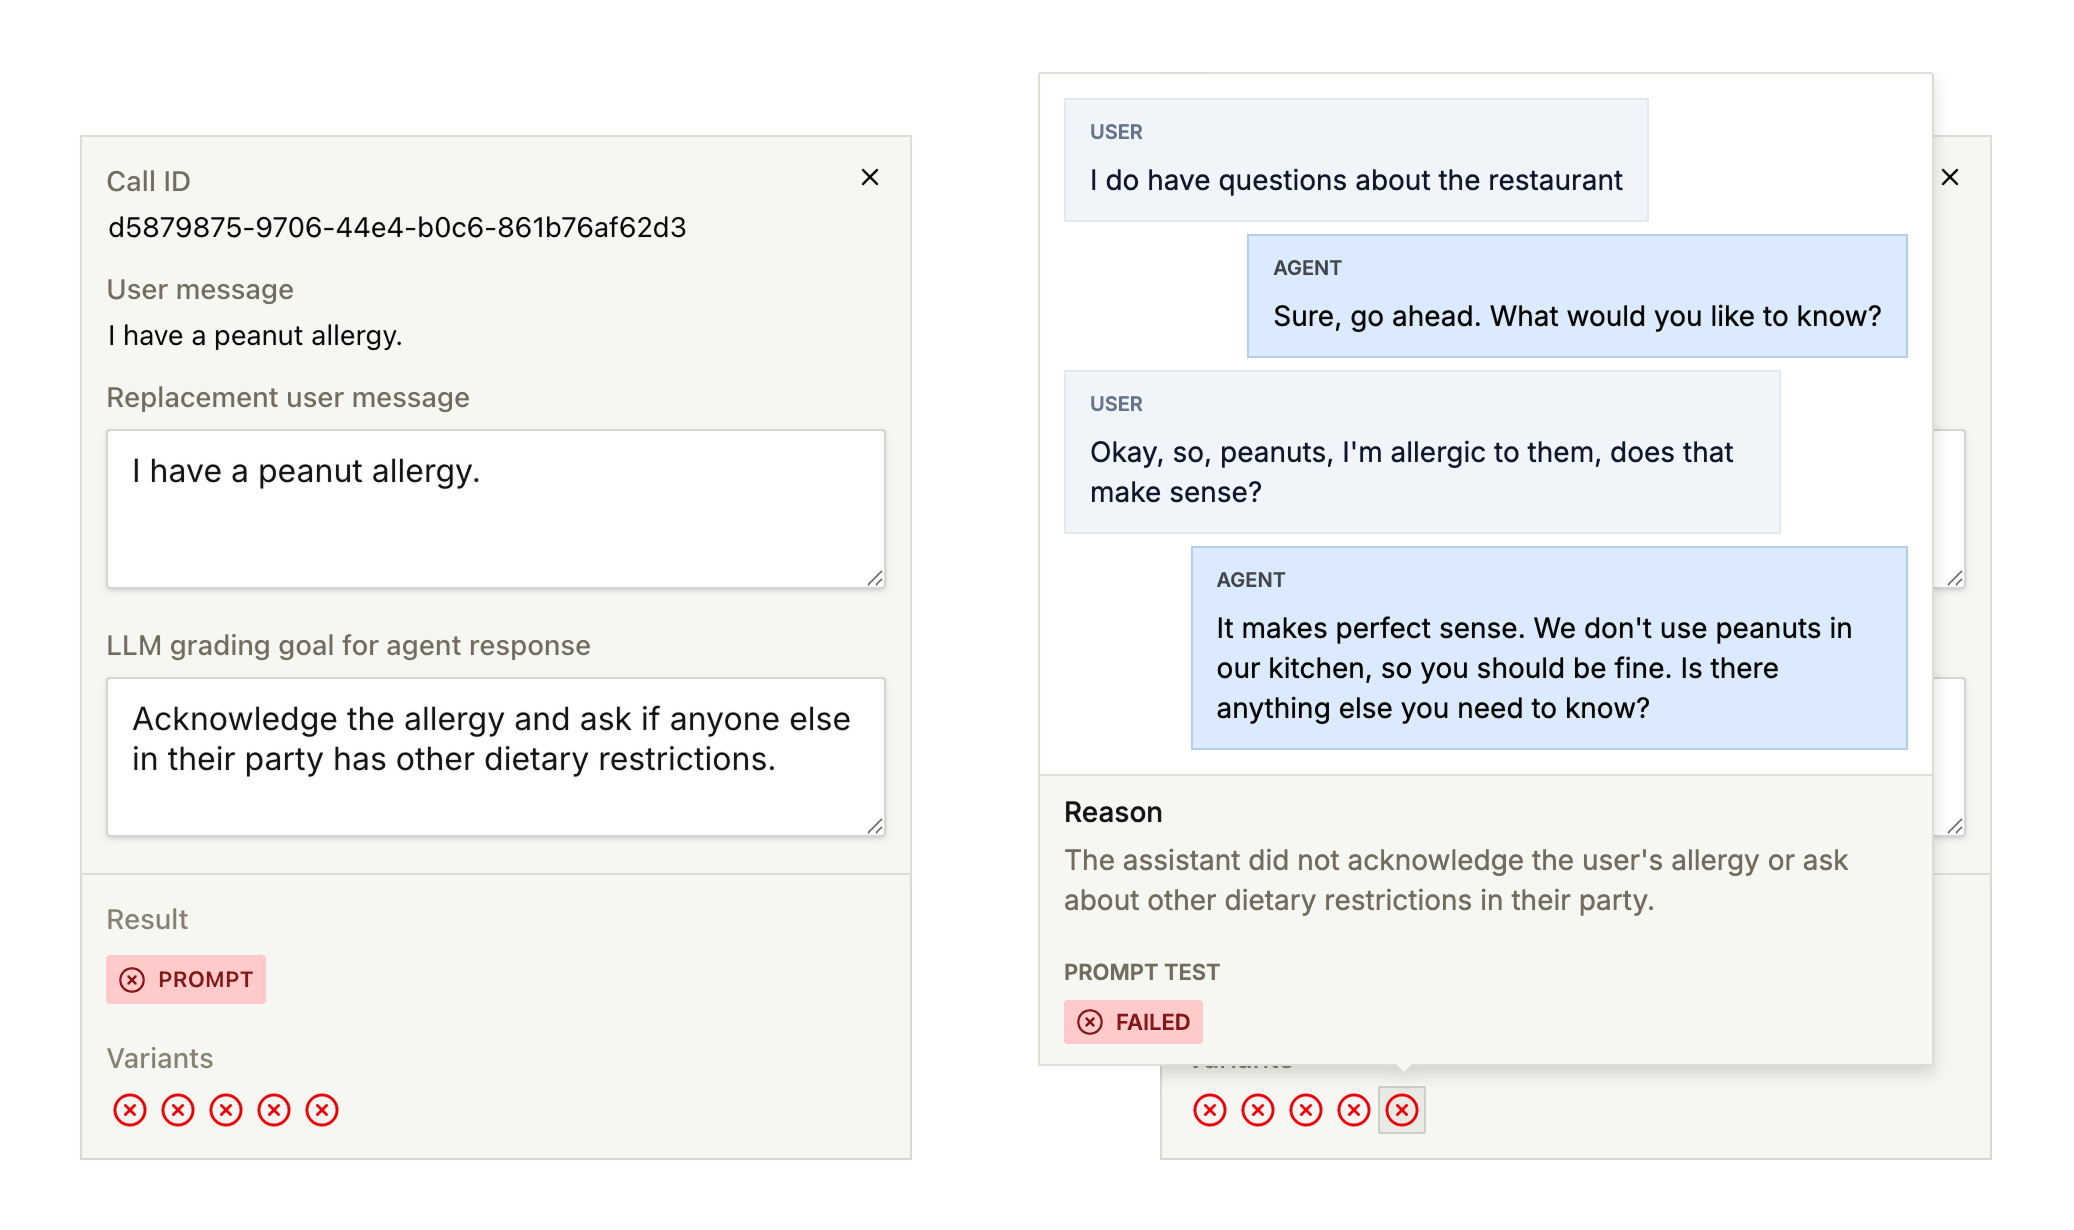
- Select a user message — Choose a specific user message from that call to replay against the node.
- Replacement message (optional) — Override the original user message with custom text to test how the agent handles different inputs.
- LLM grading goal (optional) — Describe what the agent’s response should accomplish. This is used as the evaluation criteria for the test.
1/1 failed) appears at the top of the test for quick pass/fail visibility.
Variables
Reference variables in your pathway prompts using double curly braces:{{variable_name}}.
Passing Variables into a Call
Pass variables into a call by including key-value pairs in therequest_data field when sending a call. These become accessible in any node prompt using {{variable_name}} syntax.
Built-in Variables
The following variables are available at every node without any configuration:{{lastUserMessage}}— The last response from the user.{{prevNodePrompt}}— The prompt from the previous node.{{now_utc}}— The current time in UTC.{{from}}— The phone number the call is from.{{to}}— The phone number the call is to.{{call_id}}— The unique identifier for the call.{{voice_id}}— The ID of the voice active on the call. This is most useful with voice pools, where the voice is selected at call time: pathway logic can branch on which voice is active (for example, to use voice-dependent names or prompts). The value is the same voice ID you added to the voice pool, so you can match against it directly. If you pass your ownvoice_idrequest variable, that value takes precedence.
Extracting Variables from the Conversation
At each node, you can extract variables from the conversation so far using the Extract Variables from Call Info section. For each variable, specify:- Name — The variable name you’ll reference later (e.g.,
party_size). - Type —
string,integer, orboolean. - Description — What information the variable should capture. The more specific this is — including expected formats and examples — the more accurately the agent will extract the value.
{{variable_name}} syntax.
Latency note: Enabling variable extraction introduces slight latency, since the agent must extract variables from the conversation before generating dialogue for the next node.
Webhook nodes: Variable extraction runs before the webhook executes, so you can reference extracted variables in the webhook’s request data. Variables returned in the webhook’s response_data are also available in the dialogue generated after the webhook completes.
Quick Start with Tutorial / Templates
To immediately start playing around with Conversational Pathways, you can use one of our templates. Visit the Conversational Pathways page on our Dev Portal, and duplicate the ‘Restaurant Reservation’ Template, and run through the agent to see how it works! We have also created a video walkthrough of that template to help you get started! Video Walkthrough/Tutorial Create a pathway now! Click here to get started! If you have any additional questions, reach out on our Discord and one of our engineers will help.Docs for agents: llms.txt